• Skip to primary navigation
  • Skip to main content
  • Skip to primary sidebar

Marisa's Italian Kitchen

The Secret Ingredient Is Always Love

  • Home
  • About
  • Recipes
  • Contact
  • Privacy Policy

Italian dessert

Castagnole Fritte (Italian Carnival Fritters)

February 17, 2021 by Marisa 31 Comments

Castagnole Fritte ( Italian Carnival Fritters)

Castagnole Fritte, Italian Carnival Fritters are sweet, deep fried dough balls. These Italian-style fritters are lemon scented and rolled in granulated sugar while still warm for an extra sweet bite!

Castagnole Fritte, Italian Carnival Fritters.

Although immensely popular during Carnival season in Italy, these Italian fritters always made an appearance up until our Easter holiday.

Lemon was the choice of flavour for both my parents and the only way dad would eat them. Simply because, they evoked memories of his own mamma whipping up batches of these castagnole with their very familiar lemon scent.

They were typically served on a large platter, piled high, and these sweet carnival fritters would disappear in a flash. 

Italian Carnival Fritters

In Italy, there’s no shortage of deep fried treats during Carnival season! They’re the quintessential party snack during these festivities!  

You’ll find many variations of fluffy, deep fried dough balls. Both sweet and savoury fritters. Their names will also vary depending on which part of Italy one hails from.

Unlike the popular Zeppole doughnuts with ricotta, these castagnole fritte are leavened with yeast.

They require a teeny bit more work and of course there’s also the rising time to factor in, but they are so worth it in my opinion.

However, if a yeasted dough is not your thing then consider trying some Italian Orange Frittelle: Fried Dough Balls. There’s not much hands on time to these sweet fritters. They are orange scented and partially made with finely ground almonds.

All are soft on the inside! Slightly crunchy on the outside! And totally irresistible!

How To Make Italian Castagnole Fritte

Proofing yeast and warm water in a glass bowl.
Adding flour to proofed yeast in a glass bowl.

Step One: Place a half cup if warm water in a large bowl. Sprinkle in the yeast and let this stand until the yeast turns frothy, for about 10 minutes. Then stir to dissolve.

Step Two: Add in 1 cup of flour, a pinch of salt and stir the mixture until you have a soft batter.

Flour and yeast mixture in a glass bowl with a wooden spoon in the background.
Setting aside the castagnole dough for the first rise, in a glass bowl.

Step 3: Cover the bowl with cling wrap and set aside, for 30 minutes, in a draft free area of your kitchen.

You’ll notice that the dough will expand after the first initial 30 minutes of rising time.

Mixing in eggs, sugar, lemon zest and vanilla extract in a grey mixing bowl.
Kneaded castagnole dough in a greased glass bowl.

Step 4:  Add the remaining flour, sugar, beaten eggs, zest, butter and vanilla extract to your bowl with the proofed dough. Mix with a wooden spoon till well incorporated. Then transfer the dough to a work surface and knead by hand for about 6 minutes.

You can also knead the dough directly in the bowl of a stand mixer with the hook attachment for about 3 minutes.

When ready it will pull away from the sides of the bowl and will be soft, smooth and slightly tacky.

Step 5: Transfer the dough to a lightly greased bowl and cover with cling wrap. Let the dough rise in a warm draft free area for about 1 and a half to 2 hours. Or until doubled in size.

Castagnole dough doubled in size after the second rise in a glass bowl placed over a wooden board.
Kneading by hand the castagnole dough on a brown wooden board.

Step 6: Once Doubled in size, transfer the dough onto a work surface, lightly press it down with your hands and knead the dough for about 1 minute.

Castagnole dough cut into quarters place on a brown wooden board.
Castagnole dough rolled out and cut into one inch pieces on a dark brown cookie sheet.

Step 7: Divide the dough into 4 equal pieces. Roll each piece of dough out into an 18 inch long rope. Then slice each long rope into 1 inch pieces and transfer the cut pieces onto a lightly floured baking sheet.

You can leave the pieces as is or, to make rounder dough balls, gently roll each piece of dough between the palms of your hands.

Deep Frying Italian Sweet Dough Balls

  • Pour 2 inches of vegetable or canola oil in a stock pot.
  • Heat to 375 degrees F.
  • Deep fry the fritters till golden on all sides.
  • Remove with a slotted spoon and transfer the fried dough balls to a cookie sheet lined with paper towels to drain off any excess oil.

All that’s left to do before enjoying these sweet carnival fritters is to roll them in granulated sugar while still warm.

Deep fried castagnole fritters on a black plate. .

How Long Do Castagnole Fritte Stay Fresh

Like any deep fried doughnut, they’re at their best eaten the same day while still warm and soft because they get slightly drier after a day or two.

However, 10 seconds in the microwave will quickly soften them up again.

Italian carnival fritters on a black plate with a white bowl in the background.

How to Serve Castagnole Fritte

Although wonderful all on their own while rolled in some granulated sugar, you can also fill them with your favourite jams. Nutella or other chocolate spreads would also be a delicious choice.

  • To fill these sweet fritters start by poking a hole in the doughnut.
  • Place the jam in a piping bag that is fitted with a round tip. Pipe in up to 1 teaspoon of filling into each doughnut.

Alternately, you can also fill the doughnuts with custard or even some lemon curd.

Or opt out of the filling and top them with a drizzle of some good quality chocolate spread and don’t forget the Carnival sprinkles!

And one can never go wrong with a luscious drizzle of honey over these sweet dough balls.

Whichever way you serve them, they’re sure to disappear in a flash!

Italian fried dough balls on a small white plate topped with melted dark chocolate.

And if you love doughnuts as much as I do and have some canned pumpkin lying around, you may want to try these easy to make Pumpkin Ricotta Zeppole (Italian Doughnuts)

Happy Baking!

If you make this recipe remember to tag @marisasitaliankitchen on Instagram so I can see your creation!

This post was originally published March 23, 2016 and republished February 17, 2021 with updated photos and content.

Castagnole Fritte ( Italian Carnival Fritters)
Print Recipe
5 from 1 vote

Castagnole Fritte (Italian Carnival Fritters)

Castagnole Fritte are Italian sweet fritters. These sweet deep fried dough balls are rolled in granulated sugar and traditionally served this way but you can also fill them with jam or custard. Or simply drizzle with your favourite dark chocolate.
Prep Time30 mins
Cook Time20 mins
Course: Dessert
Cuisine: Italian
Keyword: carnival fritter, Castagnole Fritte, doughnuts, fritter
Servings: 50 doughtnuts
Calories: 58kcal
Author: Marisa

Ingredients

  • 8 g active dry yeast 1 envelope
  • 1/2 cup lukewarm water
  • 3 cups all purpose flour
  • generous pinch of salt I used fine sea salt
  • 1/2 cup granulated sugar
  • 2 large eggs lightly beaten (room temperature)
  • 2 tablespoons lemon zest from 2 medium lemons
  • 1/4 cup unsalted butter softened
  • 1 teaspoon pure vanilla extract
  • vegetable or canola oil for deep frying
  • 3/4 cup granulated sugar for rolling approximately

Instructions

  • Sprinkle the yeast in a bowl containing 1/2 cup of lukewarm water and let this sit for a 10 minutes, till frothy, then stir to dissolve.
  • Add in 1 cup of the flour, a pinch of salt and stir till you get a soft batter. Cover the bowl with cling wrap and let this sit for about 30 minutes.
  • Next, stir in the remaining flour, sugar, the lightly beaten eggs, lemon zest, butter and vanilla extract. Mix well.
  • If kneading by hand: Transfer the dough to a work surface and knead for about 6 minutes. The dough should be soft, smooth and just a little bit sticky.
  • If using a stand mixer: Knead the dough in the bowl of a stand mixer with the dough hook attachment for about 3 minutes. When ready the dough will pull away from the sides of the bowl and feel somewhat tacky.
  • Lightly grease a large bowl and place the dough in the bowl.
  • Cover with cling wrap and let the dough rise in a warm draft free place for 1 to 1 ½ hours. The dough will double in volume.
  • When ready transfer the dough to a work surface, lightly punch it down with your hands and knead it for about 1 minute.
  • Divide the dough into 4 equal pieces.
  • Keep the dough covered with a clean dishcloth while working with 1 piece of dough at a time. (this will keep the dough from drying out)
  • Roll each piece of dough out into approximately an 18 inch long rope. (keep covered with clean dish cloth)
  • Cut each rope into one inch pieces and roll each piece of dough in the palm of your hands for rounder shapes.
  • Place the dough balls onto a lightly floured baking sheet. (keep covered)
  • Pour 2 inches of oil in a medium sized sauce pan or dutch oven and heat to 375* degrees. (use a deep frying thermometer for accuracy)
  • When the oil has reached 375 degrees F, carefully drop in about 6 pieces of dough at a time. (This will also depend on the size of your sauce pan). Don't over crowd them.
  • When the fritters are golden on one side, flip over to the other side.
  • Once golden brown on both sides, use a slotted spoon and drain the castagnole on paper towels.
  • Roll the castagnole in granulated sugar turning to coat all over.
  • Serve while still warm, piled high on a serving platter.
  • For a festive Carnival appeal you can drizzle them with warm melted chocolate and top with sprinkles.

Notes

Temperature for deep frying castagnole
When deep frying the fritters try to keep the temperature of the oil at 375 degrees F. At this temperature they'll absorb minimal oil. If too hot they will over brown on the outside and will be raw on the inside.
Deep frying a small batch of 6 pieces at a time should take about 2 minutes approximately.
Reheating leftovers
As with any deep fried fritters, they're at their best served while still warm.
However, any leftovers can be heated in the microwave for about 10 seconds, a few at a time.
They'll turn out soft, fluffy and just as yummy as freshly made.

Nutrition

Calories: 58kcal | Carbohydrates: 11g | Protein: 1g | Fat: 1g | Saturated Fat: 1g | Trans Fat: 1g | Cholesterol: 9mg | Sodium: 3mg | Potassium: 13mg | Fiber: 1g | Sugar: 5g | Vitamin A: 38IU | Vitamin C: 1mg | Calcium: 3mg | Iron: 1mg


Filed Under: Dessert, Doughnuts Tagged With: castagnole, cherry, dessert, doughnuts, Italian dessert, Italian doughnuts, Italian Food, Lemon

Chocolate Orange Ricotta Tart

March 25, 2019 by Marisa 32 Comments

Chocolate Orange Ricotta Tart

A simple yet elegant Chocolate Orange Ricotta Tart. This Italian treat is made with pasta frolla, an Italian sweet pastry dough. It has a silky smooth filling of ricotta and mascarpone cheeses. The zest of mandarines with its juices adds a lovely citrusy scent. And of course some grated semi-sweet chocolate simply because chocolate does indeed make everything better.

Chocolate Orange Ricotta Tart


Italian Easter Tart

Growing up Italian in a predominately french city, there never was any lack of desserts after a fine celebratory meal.

Easter Sunday was no exception especially after a mandatory and traditional simple roast of agnello or rather lamb.

Desserts as well never wavered far from the customary sweets from way back home in Italy.

One in particular which graced our table each and every Easter was la cassata. A typical tart from my home town made with ricotta, sheep’s milk cheese and chocolate which utilizes many eggs. It always had mamma and her sisters vying for the coveted spot of who used the most eggs.

It’s not unusual to use anywhere from 20 to 30 eggs when making la cassata from my Paese in the Lazio region of Italy.

Although not my mamma’s cassata this chocolate orange ricotta tart still pulls at my heartstrings. It’s somewhat similar in taste to the one I grew up on but way much lighter and not as dense.

Pastry dough for ricotta tart.

What is Pasta Frolla

Pasta frolla is a crumbly short crust pastry that is rolled out and used to line tart tins. It can be used as a base for savoury meals or sweet desserts.

It’s really easy to make and also quite forgiving if any breakage occurs, which can be easily remedied by working it back together with either your fingers or the back of a spoon.

Freshly baked Italian ricotta tart.

For this ricotta tart recipe I used a 10 inch tart tin with a removable base but you can also use a 9 inch tart tin.

If using a 9 inch tin you’ll want to divide the pastry dough in half while using one half and freezing the other to use at a later time. Or you can make some pretty cut out cookies with the remaining dough and use to decorate the tart.

You’ll also have to compensate for the slightly smaller tart tin by reducing the amount of time baked.

Chocolate and Orange Tart topped with cookie cutouts.

Orange and chocolate are one of my absolute favourite pairings.

Since I had so many sweet mandarins lying around I decided to use both the zest and the juices from this sweet fruit.

You can however substitute the mandarins with the zest of an orange.

Ricotta tart on a gold tray.

All that’s needed is a light or generous dusting of icing sugar just before serving.

A slice of orange and ricotta tart.

This creamy and dreamy tart is especially delightful with your favourite cup of coffee or tea!

Enjoy while still warm or cold.

If you make this recipe remember to tag @marisasitaliankitchen on Instagram so I can see your creation!

This post was originally published April 14, 2017 and updated with new content and photos March 25, 2019.


Chocolate Orange Ricotta Tart
Print Recipe
0 from 0 votes

Chocolate Orange Ricotta Tart

Chocolate Orange Ricotta Tart is a light Italian torta made with a pastry crust, ricotta and mascarpone cheeses, grated chocolate and scented with orange zest.
Course: Dessert
Cuisine: Italian
Keyword: Ricotta, Tart, Crostata, Italian dessert, Easter
Servings: 12
Author: Marisa

Ingredients

  • FOR THE PASTRY CRUST
  • 12 tablespoons unsalted butter softened
  • 1/4 cup granulated sugar
  • 1 egg yolk from a large egg
  • 2 cups all-purpose flour
  • RICOTTA FILLING
  • 2 cups ricotta cheese
  • 1 cup mascarpone cheese
  • 1 cup granulated sugar
  • 3 large eggs beaten
  • grated zest from 3 small tangerines or 1 large orange
  • 2 tablespoons tangerine juice or orange juice
  • 2 ounces grated semi-sweet chocolate
  • icing sugar for dusting

Instructions

  • MAKING THE PASTRY
  • In a large mixing bowl beat the butter and the sugar until smooth.
  • Add in the egg yolk and beat until thoroughly combined.
  • Stir the flour into the mixture.
  • Transfer the mixture to a work surface and work the dough with your hands until you get a smooth pastry dough.
  • Roll out the pastry dough on a lightly floured work surface and carefully transfer the dough to a 10 inch round tart tin with a removable bottom.
  • Place in the fridge to chill for 30 minutes.
  • Preheat the oven to 350 degrees F and start making the filling.
  • Place the ricotta and the mascarpone cheese in a large bowl and beat until smooth.
  • Add the sugar, eggs, orange juice, zest and beat until thoroughly combined.
  • Fold in the grated chocolate then pour the mixture over the prepared pastry dough.
  • Bake for 50 to 60 minutes until the filling is set.
  • Remove the tart from the oven and let cool in the tin.
  • Once cooled dust with icing sugar and serve.

Notes

Recipe is adapted from Cafe Italia cookbook by Liz Franklin with a few switch ups. I substituted the lemon juice and zest with mandarin juice and zest and added 2 ounces of grated semi-sweet chocolate.The original recipe called for using half the pastry dough, baking it in a 9 inch tart tin for 45 minutes.I used a 10 inch tart tin, used the whole amount of pastry dough and therefore increased the baking time by almost 15 minutes to compensate for a bigger tart.


Filed Under: Dessert Tagged With: Baking, cheesecake, chocolate, crostata, Easter, Italian dessert, mascarpone, orange, ricotta, sweets, tart, Torta

Italian Plum Almond Streusel Cake

October 9, 2018 by Marisa 16 Comments

Italian Almond Streusel Cake

An Italian Plum Almond Streusel Cake to delight your guests with its dense moist crumb, topped with pools of soft jammy plums and almond streusel topping.

Italian Almond Streusel Cake

I’ve never actually baked with Italian plums before. These plums were always enjoyed plucked straight off my Zia’s tree, who so generously shared her bounty with us.

If memory serves me, it wasn’t an overly big tree by any stretch. Only reaching to about 10 feet in height, or so it seemed to my younger self. As this winter tree is now being enjoyed by another nurturing family, I contend myself with the store bought variety.

They’re just as wonderfully luscious as the ones grown in our own back yards. These Italian prune plums are also exceptional if you favour canning or even hydrating your fruits.

Italian plums in a silver colander

IS IT A PRUNE OR IS IT A PLUM?

They are actually Freestone plums, meaning that the pit easily separates from the flesh. These are the plums that are most often dried out to make prunes.

Available during late summer to early autumn, these prune plums have a distinctive oblong shape. Its skin is tinged a deep purple with a reddish blueish hue and reveals a firm juicy flesh when bitten into.

They’re quite the delectable fruit and you’ll find that they hold up well in cooking or even baking.

Plum cake batter in a silver cake pan

Once baked the purple hue is transformed to a fuchsia like brightness, crowning the cake in pools of soft and sweet jammy goodness.

Freshly baked Italian cake in a silver cake pan and topped with plums.

The streusel topping and the sliced almonds are totally optional over this Italian plum cake. And really just as wonderful without it.

However, I thought to put to use the extra streusel I had in my freezer after making these outrageously good Raspberry Crumb Muffins.

It adds such a lovely contrast in texture, not to mention how prettily they compliment this jammy cake. All that’s left to dress up this plum cake is a generous dusting of powdered sugar.

Its rustic. Its simple and super yummy! Also…it makes tea time and coffee time that much more enjoyable!

Plum cake topped with sliced almonds on parchment paper.

Want more fruity topped cakes such as this Italian plum cake? 

Then you might also enjoy these other fruit topped desserts:

  • Apple Rose Cake
  • Chocolate and Pear Crostata
  • Rustic Italian Apple Cake

Italian Plum Almond Streusel Cake

Happy baking dear friends!

If you make this recipe remember to tag @marisasitaliankitchen on Instagram so I can see your creation!

Italian Almond Streusel Cake
Print Recipe
0 from 0 votes

Italian Plum Almond Streusel Cake

An Italian Almond Streusel Cake to delight your guests with its dense moist crumble, topped with pools of soft jammy plums and almond streusel.
Prep Time40 mins
Cook Time45 mins
Total Time1 hr 25 mins
Course: Dessert
Cuisine: Italian
Keyword: Italian Plum Almond Streusel Cake
Servings: 8
Calories: 469kcal

Ingredients

STREUSEL TOPPING

  • 4 tablespoons all purpose flour
  • 4 tablespoons granulated sugar
  • 1/8 teaspoon ground cinnamon
  • 2 tablespoons unsalted butter cubed

FOR THE CAKE

  • 1/2 cup unsalted butter softened
  • 2/3 cup brown sugar firmly packed
  • 2 large eggs
  • 1 teaspoon pure vanilla extract
  • 1/2 teaspoon pure almond extract
  • 1 cup all purpose flour
  • 1/2 cup almonds very finely ground
  • 1 1/2 teaspoon baking powder
  • 1/2 teaspoon baking soda
  • 1/2 teaspoon cinnamon
  • pinch of salt
  • 2/3 cup sour cream full fat
  • 7 italian plums halved and pits removed
  • 1/4 cup sliced almonds
  • powdered sugar for dusting

Instructions

STREUSEL TOPPING

  • In a small bowl, mix together the CRUMB MIXTURE ingredients using your hands or a food processor just until the mixture resembles coarse crumbs.
  • Refrigerate till ready to use.

FOR THE CAKE

  • Grease an 8 inch round spring form pan, line with parchment paper then grease the parchment paper. Set aside.
  • Preheat the oven to 350 degrees F.
  • In a large bowl beat together the softened butter with the brown sugar until fluffy.
  • Beat in the eggs one at a time just until combined.
  • Stir in both the vanilla and almond extracts.
  • In a medium sized bowl, whisk together the flour, finely ground almonds, baking powder, baking soda, cinnamon and salt.
  • Stir the flour mixture into the butter mixture alternating with the sour cream, making 3 additions of the flour and 2 of the sour cream, just until smooth.
  • Scoop the batter into the prepared cake pan and smooth the top with the back of a spoon.
  • Slice the plum halves length-wise into 1/4 inch slices and while keeping the slices together place them in clusters over the cake batter.
  • Sprinkle the streusel topping between and around the sliced plums and top with the sliced almonds.
  • Bake in the preheated oven for about 40 to 45 minutes or until a cake tester inserted in the middle comes out clean.
  • Allow the cake to cool in the pan for about 20 minutes before releasing it from the pan.
  • Once completely cooled dust the cake with powdered sugar, slice and enjoy!

Nutrition

Calories: 469kcal | Carbohydrates: 50g | Protein: 8g | Fat: 28g | Saturated Fat: 12g | Cholesterol: 94mg | Sodium: 110mg | Potassium: 367mg | Fiber: 3g | Sugar: 31g | Vitamin A: 828IU | Vitamin C: 6mg | Calcium: 128mg | Iron: 2mg


Filed Under: Cakes, Dessert Tagged With: almond, cake, Italian dessert, plum, rustic Italian

Chocolate and Pear Crostata

August 29, 2018 by Marisa 61 Comments

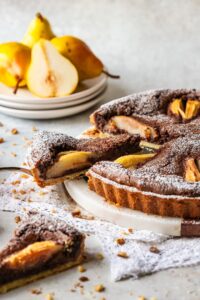
Pear and chocolate crostata with three slices cut off.

An elegant and impressive Chocolate and Pear Crostata with a silky smooth filling of finely ground walnuts and dark chocolate. As a bonus it’s remarkably easy to put together.

Chocolate and pear crostata.

This recipe was originally published October 1, 2015 and republished August 29, 2018 with updated content and photos.

Although it has been a couple of years since my dad passed away, his pear tree continues to flourish. A constant and wonderful reminder of how he passionately tended and nurtured his garden.

It lays mostly dormant right now except for this one majestic pear tree. This lone pear tree bears more fruit than we can possibly consume. Although, I must say the squirrels are certainly giving us a run for our money!

Its branches are now weighed down heavily and bursting with delectable fruits while some are strewn all over the ground, blanketed in green and gold.

These ripened sweet fruits are just about ready to be plucked off and sink ones teeth into. But since I have so many…well why not bake with them! Right?

Short crust pastry in a round tart tin.

What is a Crostata?

A crostata is essentially a rustic baked tart with a short crust pastry base. Its basically free-form and in my opinion far easier to make then a 2 crust pie.

This crostata is so outrageously good, it will take a lot of restraint not to devour the whole tart. It is made with a pastry crust much like shortbread and with a silky rich chocolate filling.

Part of the appeal of this crostata are the juicy pear halves which are sliced and nestled over the chocolate filling. They provide such an elegant appearance and are sure to garner many compliments.

But really, feel free here to add your own artistic flare and fan out the slices which ever way you wish!

Chocolate and pear filling encased in a short crust pastry.

Freshly baked chocolate crostata topped with sliced pears on a white and grey dishcloth.

Although you may use a mixer to make the pastry dough, I much prefer using my food processor. The dough comes together with such ease rendering it soft and pliable and making it very easy to pat down both over and around the tart tin.

A chocolate tart with topped with sliced pears.

I tried this crostata once using almonds and another time using walnuts. I must say, my husband and I both prefer the walnuts, but they are easily interchangeable. Whichever nuts you choose, this recipe is a real keeper!

Pear and chocolate crostata with three slices cut off.

As with all fabulous desserts, do savour every single bite accompanied by a very good espresso of course!

Pear and chocolate crostata with three slices cut off.
Print Recipe
0 from 0 votes

Chocolate and Pear Crostata

Chocolate and Pear Crostata with a silky smooth filling of finely ground walnuts and dark chocolate makes a rustic, elegant dessert.
Prep Time30 mins
Cook Time45 mins
Chilling Time30 mins
Course: Dessert
Cuisine: Italian
Keyword: Chocolate Pear Crostata Recipe
Servings: 8
Calories: 812kcal
Author: Marisa

Equipment

  • 9 inch round baking tin

Ingredients

For the Pastry

  • 3/4 cup or 12 tablespoons butter cubed
  • 1/4 cup granulated sugar
  • 1 large egg yolk
  • 2 cups all purpose flour

For the Chocolate Filling

  • 14 tablespoons butter cubed
  • 1 cup granulated sugar
  • 3 large eggs beaten
  • 1 1/3 cups walnuts, lightly toasted finely ground
  • 2 tablespoons all purpose flour
  • 3 1/2 ounces dark chocolate or semi-sweet chocolate, melted I used 70% dark chocolate
  • 4 ripe firm pears
  • powdered sugar for dusting
  • 9 inch round tart tin with removable base

Instructions

Making the Pastry

  • Place the butter and sugar together in a food processor and blend until smooth.
  • Add in the egg yolk and blend again until it is thoroughly mixed.
  • Next, add in the flour and pulse intermittently until the dough is smooth and not sticky.
  • Divide the dough in half and freeze one half for later use. A half portion of this dough is enough to line a 9 inch baking tin. 
  • Line the greased tart tin with the dough by patting it down in the tart tin while spreading it out with your fingers.
  • Chill for at least 30 minutes.

For the Filling

  • Beat together the butter with the sugar until light and fluffy.
  • Add in the eggs, ground walnuts, flour and beat until smooth.
  • Stir in the melted chocolate.
  • Spoon the mixture over the pastry and smooth it gently with a pastry knife.
  • Peel the pears and cut them in half length-wise.
  • Remove the cores and slice each half length-wise into thin slices.
  • While keeping each of the sliced halves together, place them over the chocolate filling. (As seen in the photo)
    Chocolate and pear filling encased in a short crust pastry.
  • Bake in a preheated oven at 350 degrees F, for about 45 minutes or until the walnut mixture is firm and the pastry is golden brown.
  • Transfer to a wire rack to cool then dust with powdered sugar just before serving.

Notes

You will only need half of the pastry dough to make a 9 inch crostata. The remaining half can be frozen for later use. However, if your tart tin is 10 inches round do use the whole amount of pastry dough. I've done so successfully without changing the amount of filling.
Recipe is adapted from a favourite cookbook, Cafe Italia Cookbook and only switching almonds for the walnuts as a personal preference. 

Nutrition

Calories: 812kcal | Carbohydrates: 65g | Protein: 10g | Fat: 59g | Saturated Fat: 29g | Cholesterol: 194mg | Sodium: 365mg | Potassium: 245mg | Fiber: 4g | Sugar: 35g | Vitamin A: 1298IU | Vitamin C: 1mg | Calcium: 57mg | Iron: 4mg


Filed Under: Dessert Tagged With: chocolate, crostata, Italian dessert, pastry, pear, sweets, walnuts

Italian Spumoni Cake

May 13, 2017 by Marisa 28 Comments

Italian Spumoni Cake

Delicious flavours of the ever popular Italian ice-cream better known as simply Spumoni! Here it’s revisited in a three layered spectacular Italian Spumoni Cake that is sure to impress!

Italian Spumoni Cake

Crumbly cake layers of strawberry, chocolate and pistachio are stacked together while separated by strawberry preserves and pistachio cream. Frosted with a vanilla scented buttercream, sprinkled with some crushed pistachios and then decorated with spumoni flavoured french macarons for a truly celebratory dessert.

Every once in a while hubby will surprise me with the latest Bake From Scratch Magazine, packed full of drool worthy baked goods that can easily be replicated at home. A true baker’s delight in every sense of the word.

This latest issue has some of the loveliest naked cakes or rather nearly naked cake recipes and the one that caught my eye was the Spumoni Cake. I love it for its pretty trifecta of colours which takes me back to those lazy hot summer days, happily sitting outside while enjoying some yummy spumoni ice-cream.

Italian Spumoni Cake

Although I’m not a baker by profession and have only ever baked a few layered cakes in my lifetime, I found this cake not difficult at all to put together and I’m sure you will too.

While you’ll basically be baking three separate layers, it’s really one cake batter divided among three separate bowls.

One bowl will have strawberry preserves folded into the batter, the second bowl will have cocoa mixture folded in while the third bowl gets some delicious pistachio paste.

Italian Spumoni Cake

You’ll want to begin assembling the cake directly on its serving platter lined with 2 pieces of parchment paper joined at the centre.

You then simply pull out the 2 sections when you’re done frosting for easy clean up.

Italian Spumoni Cake

Since decorating this beautiful Italian Spumoni Cake is where the fun really begins, do know that you can truly use your imagination here so feel free to add your special touch.

Although, the original recipe called for freeze dried strawberries to garnish the cake, they were really hard to find and I had absolutely no luck in finding them. However, I did come across some adorable french macarons looking simply perfect and I new they would adorn this cake quite beautifully.

I used a little dab of buttercream on one side of the macaron so that they adhered to the cake and I must say they added such a lovely touch to the overall look! Who would not want to sink their teeth into a slice of this delicious goodness…right?

Actually, hubby and I did just that! Day after day and just until there was not a crumb left. But please don’t judge, you would have done the exact same thing, I’m sure of it!

Italian Spumoni Cake

Worth mentioning here is how this cake actually tastes better the following days. Partially due to the preserves and pistachio paste nestled between the layers which keeps the cake very moist and also enhances the flavours of this visually stunning cake. As a result, this cake is an excellent make ahead dessert for those busy and extremely chaotic occasions which we all have from time to time.

Pistachio cream can also be made ahead and kept in an airtight container at room temperature for up to 1 week. You can therefore really pace yourself by making a few steps ahead of time which is always a win win in my book.

Most of all have fun.

Italian Spumoni Cake
Print Recipe
0 from 0 votes

Italian Spumoni Cake

All the flavors of the ever popular Italian ice-cream better known as simply Spumoni, is revisited in a three layered spectacular Italian Spumoni Cake that is sure to impress.
Course: Dessert
Cuisine: Italian
Keyword: Italian cake, Italian spumoni cake
Servings: 12
Author: Marisa

Ingredients

  • FOR THE CAKE LAYERS
  • 1 cup unsalted butter softened
  • 2 cups granulated sugar
  • 3 large eggs
  • 2 3/4 cups cake flour
  • 1/2 cup all purpose flour divided
  • 1 tablespoon baking powder
  • 1 teaspoon kosher salt I used fine sea salt
  • 240 grams or 1 cup whole milk
  • 1 teaspoon vanilla extract
  • 1 cup strawberry preserves divided
  • 1/4 cup unsweetened cocoa powder
  • 1/4 cup boiling water
  • 1/2 teaspoon baking soda
  • pistachio paste recipe below
  • vanilla buttercream recipe below
  • chopped pistachios for garnishing
  • macarons to decorate spumoni colors, chocolate, strawberry and pistachio OPTIONAL
  • PISTACHIO PASTE
  • 2 cups roasted pistachios
  • 2 tablespoons of honey
  • 1/4 water
  • VANILLA BUTTERCREAM
  • 1 1/2 cups unsalted butter softened
  • 2 teaspoons pure vanilla extract
  • 1/2 teaspoon of kosher salt I used fine sea salt
  • 9 cups confectioner's sugar icing sugar
  • 6 tablespoons whole milk

Instructions

  • CAKE LAYERS:
  • Preheat the oven to 350 degrees F
  • Grease and flour 3 (9 inch ) round cake pans.
  • In a large bowl, beat butter and sugar together at medium speed just until fluffy.
  • This should take about 3 to 4 minutes and if your using a stand mixer, you'll want to stop and scrape the sides of the bowl a few times.
  • Add the eggs one at a time and beat well after each addition.
  • In a separate medium sized bowl, whisk together the cake flour, 1/4 cup all purpose flour, baking powder and salt.
  • With your mixer on low speed, gradually add the flour mixture to the butter mixture alternating with the milk while starting with the flour mixture and ending with the flour mixture.
  • Beat just until combined between each addition.
  • Beat in the vanilla extract.
  • Divide the batter evenly among 3 separate bowls.
  • In the first bowl, fold in a 1/2 cup of well stirred strawberry preserves and the remaining 1/4 cup all-purpose flour.
  • Combine the cocoa, 1/4 cup of boiling water and baking soda in a small bowl.
  • Fold the cocoa mixture into the second bowl of cake mixture.
  • In the third bowl of cake mixture, fold in a 1/2 cup of pistachio paste.
  • Spoon the cake batters into the prepared pans and smooth the tops with an offset spatula.
  • Bake in preheated oven for 20 to 25 minutes.
  • Test to see if its done by inserting a wooden skewer in the center of the cake. If it comes out clean then the cakes are ready.
  • Allow the cakes to cool in the pan for 10 minutes then invert onto a wire rack to cool completely.
  • ASSEMBLING THE CAKE LAYERS
  • Place the strawberry cake layer onto your serving platter and pipe a ring of vanilla buttercream all around the inside edge of the strawberry cake layer, creating a border.
  • Spread the remaining 1/2 cup strawberry preserves over the strawberry cake layer making sure to stay between borders.
  • Carefully place the chocolate cake layer over the strawberry layer and pipe a ring of vanilla buttercream around the inside edge, creating a border.
  • In a small bowl stir very well together 1/2 cup of the vanilla buttercream with the remaining pistachio paste and spread this over the chocolate layered cake while staying within the border.
  • Carefully top the pistachio cake layer over the chocolate cake layer.
  • Spread the remaining vanilla buttercream over the top and sides of the 3 layered cake. (I used a buttercream icing smoother to create the naked cake look)
  • Garnish with chopped pistachios and chocolate, strawberry, pistachio macaron cookies if desired.
  • PISTACHIO PASTE
  • Grind pistachios as fine as you can using a food processor or better yet a spice grinder if you have one.
  • Stir together the grind pistachios and honey in a small bowl.
  • Stir in 1/4 cup of water, 1 tablespoon at a time, until the paste has a consistency of peanut butter.
  • Pistachio paste can be made ahead and stored in an air tight container at room temperature up to one week.
  • VANILLA BUTTERCREAM
  • Place the butter in a large bowl and beat at medium speed just until creamy.
  • Beat in the vanilla and the salt.
  • Reduce the speed to low and slowly add the confectioners sugar.
  • Increase the speed to medium and continue beating until smooth.
  • Beat in the milk one tablespoon at a time until the buttercream frosting reaches a spreadable consistency.

Notes

Recipe is adapted from Bake From Scratch Magazine.


Filed Under: Cakes, Dessert Tagged With: buttercream, cake, chocolate, Italian dessert, pistachio, strawberry

Next Page »

Primary Sidebar

A Little About Me

blankHi I'm Marisa! Welcome to my little corner of the web where you'll find delicious foods inspired by my Italian heritage and Canadian upbringing. So kick off your shoes, have a seat and stay awhile... Read More…

Search In My Kitchen

Copyright © 2021 · Foodie Pro & The Genesis Framework