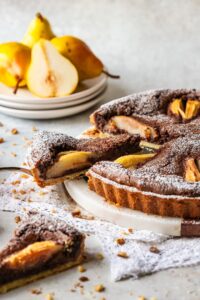
An elegant and impressive Chocolate and Pear Crostata with a silky smooth filling of finely ground walnuts and dark chocolate. As a bonus, it's effortless to put together. Although it has been …
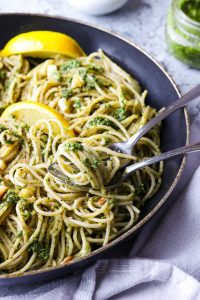
Kale Walnut Pesto with Spaghetti
Kale and Walnut Pesto with Spaghetti is a healthy, nutrient packed pasta dish. It's easy and quick to put together which makes it simply perfect for any day of the week. What do you make …

Chocolate Zucchini Doughnuts
Baked Chocolate Zucchini Doughnuts with finely chopped walnuts, topped with a chocolate glaze and some pretty sprinkles. I have shared a couple of doughnut recipes here on the blog before and …