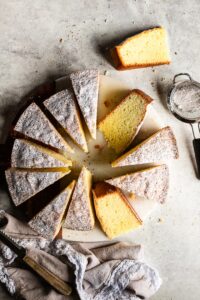
• Skip to primary navigation
  • Skip to main content
  • Skip to primary sidebar

Marisa's Italian Kitchen

The Secret Ingredient Is Always Love

  • Home
  • About
  • Recipes
  • Contact
  • Privacy Policy

cake

Cherry Crumb Cake Recipe

July 10, 2020 by Marisa 37 Comments

Serving a slice of cherry crumb cake

A deliciously moist and tender Cherry Crumb Cake that is sure to receive rave reviews at your next potluck or barbecue. This easy to make breakfast type cake is crowned with fresh ruby red cherries and a lemon scented, almond crumb streusel topping. 

Cherry crumb cake recipe

Having a neighbouring outdoor farmer’s market that’s opened 24 hours a day certainly has its perks. Especially coming off work after a late evening shift!

This farmer’s market is in the heart of a bustling metropolis. The fruit and vegetable stands are filled great produce at extremely affordable prices. However, they’re only opened during the Spring to Fall.

With cherry season upon us and outdoor stands brimming with one of summer’s luscious fruits, who can resist the pull to purchase this delectable fruit!

I’d be quite content savouring every juicy bite while basking in the warmth of a beautiful sunny day. However… transforming them into a special baked treat…is definitely the cherry on the cake!

Fresh cherries on a white wooden board.

How to Make an Almond Streusel topping for a Crumb Cake

Almond streusel topping in a yellow and blue bowl.

We’ll start first with this almond and lemon scented crumb topping.

Simply combine the flour, sugar, melted butter, sliced almonds, lemon zest, salt and cinnamon in a bowl.

Stir the crumb top ingredients together until the mixture is crumbly. Use your hands to do this as it makes the job a whole lot easier.

Let it chill in the fridge while you pit the cherries.

And if you’re planning ahead, this almond streusel topping can be made and stored for up to 5 days.

How to Pit Cherries

Pitted cherries on a white wooden board.

To easily pit the cherries, it goes without saying that a cherry pitter is your best friend here!

But no worries if you don’t have one. You can just as easily quarter the cherries around the pit with a pairing knife.

I find it messier with a knife but it definitely gets the job done!

Once the cherries are all pitted, you can either slice them in half or in quarters. Both are fine for topping the cherry cake.

Set the cherries aside while you prepare the cake batter.

How to Make a Cherry Crumb Cake

Almond cake batter in a grey mixing bowl.
Cake batter poured in a silver baking pan.

  • With a stand mixer or a hand held mixer, beat the butter and sugars together until fluffy. This should take about 3 to 4 minutes.
  • If using a stand mixer, make sure to stop occasionally and scrape down the sides of the bowl.
  • Beat in the eggs one at a time while mixing well after each addition.
  • Mix in both the vanilla and almond extracts.
  • In a separate bowl, whisk well together the flour, baking powder and salt. This will remove any large lumps.
  • With mixer on low speed, gradually add the flour mixture to the butter mixture while alternating with the almond milk. You can substitute the almond milk with buttermilk or whole milk.
  • Pour the cake batter into a greased 8 inch springform pan and smooth the top with an off set spatula.

Sliced pitted cherries topped over cake batter.

Scatter the pitted and quartered cherries evenly over the cake batter. If they overlap somewhat, it’s totally ok.

Almond streusel topping sprinkled over cherries in a baking pan.

Sprinkle the almond crumb topping over the cherries while making sure to spread evenly over the cherries and covering them completely. 

Bake the cherry cake for about 1 hour.

Test for doneness with a wooden skewer. If it comes out clean when inserted in the middle, then you’re good.

Cherry crumb cake dusted with powdered sugar.

Allow the cake to cool in the pan for about 15 minutes.

Then release the cake and transfer to a wire rack to cool completely.

Dust the cherry crumb cake with powdered sugar, slice and serve!

Cherry cake sliced into 8 portions.

This cherry crumb cake has all the makings of a delicious coffee cake. It’s wonderfully soft and dense in texture.

It makes for a lovely contrast with the burst of cherries just beneath the crumbly layer of almond crumble topping. 

And there’s definitely some sweet goodness in every bite!

Happy baking!

Serving a slice of cherry crumb cake

This recipe was originally published June 23, 2017 and republished with new content and photos July 10, 2020.

Cherry crumb cake recipe
Print Recipe
0 from 0 votes

Cherry Crumb Cake

An almond flavoured Cherry Crumb Cake recipe made with fresh cherries. This easy to make cake is crowned with a lemon scented streusel topping.
Course: Dessert
Cuisine: American
Keyword: Breakfast cake, Cherry Crumb Cake, Coffee cake, Streusel cake
Servings: 12
Calories: 346kcal
Author: Marisa

Ingredients

ALMOND CRUMB TOPPING

  • 3/4 cup all purpose flour
  • 1/2 cup granulated sugar
  • 1/3 cup unsalted butter melted
  • 1/4 cup sliced almonds
  • 2 teaspoons lemon zest
  • 1/2 teaspoon salt I used fine sea salt
  • 1/4 teaspoon ground cinnamon

FOR THE CHERRY CRUMB CAKE

  • 1/2 cup unsalted butter softened
  • 1/2 cup granulated sugar
  • 1/4 cup firmly packed light brown sugar
  • 2 large eggs
  • 1 teaspoon pure vanilla extract
  • 1 teaspoon pure almond extract
  • 1 1/2 cups all purpose flour
  • 1 teaspoon baking powder
  • 1/4 teaspoon salt I used fine sea salt
  • 1/4 cup almond milk substitute with buttermilk or whole milk
  • 1 pound cherries pitted and quartered

Instructions

ALMOND CRUMB TOPPING

  • Combine all ingredients for the almond crumb topping in a small bowl and stir until the mixture is crumbly.
  • The mixture can be made ahead and stored in the fridge for up to 5 days.

CHERRY CRUMB CAKE

  • Preheat the oven to 350 degrees F
  • Grease and flour an 8 inch springform pan then line the pan with parchment paper and grease the parchment paper.
  • In a large bowl, beat the butter and sugars together on medium speed until fluffy. About 3 to 4 minutes.
  • If using a stand mixer make sure to occasionally stop and scrape the sides of the bowl.
  • Beat in the eggs one at a time, making sure to mix well after each addition.
  • Mix in the vanilla and almond extracts.
  • In a medium sized bowl, whisk together the flour, baking powder and salt.
  • With the mixer reduced to low, gradually add the flour mixture to the butter mixture while alternating with the almond milk.
  • Begin and end with the flour mixture.
  • Pour the batter into your prepared pan and smooth the top with an offset spatula.
  • Spread the pitted cherries evenly over the cake batter.
  • Sprinkle the almond crumb topping over the cherries.
  • Bake the cake for about 1 hour or until a wooden skewer inserted in the middle comes out clean.
  • Remove the cake from the oven and let cool in the pan for about 15 minutes before releasing the cake and then transfer to a wire rack to cool completely.
  • The cake can be covered and stored at room temperature for up to 2 days or refrigerated for up to 6 days.

Notes

Recipe is adapted from Bake From Scratch Magazine July/August issue 2017 with a few switch-ups. 
I omitted the pecans, lime and fresh ginger to the crumb topping simply for personal taste.
I replaced them with lemon zest and sliced almonds to enhance the almond taste in the crumb topping.
Also I substituted the buttermilk with almond milk because that's what I usually have readily on hand. And what I found is that it complements the almond flavour of the cherry cake quite well.
But feel free to use buttermilk or whole milk if you prefer.

Nutrition

Calories: 346kcal | Carbohydrates: 47g | Protein: 5g | Fat: 16g | Saturated Fat: 9g | Cholesterol: 61mg | Sodium: 167mg | Potassium: 194mg | Fiber: 2g | Sugar: 26g | Vitamin A: 458IU | Vitamin C: 3mg | Calcium: 54mg | Iron: 2mg


Filed Under: Cakes, Dessert Tagged With: breakfast cake, cake, cherry, coffee cake, crumb topping, dessert

Pumpkin Roll Cake

November 9, 2019 by Marisa 55 Comments

Three slices of pumpkin roll cake on parchment paper

Dazzle family and friends with a simple to make yet show stopping Pumpkin Roll Cake! It has all the wonderful aromas of Fall with fragrant pumpkin pie spices such as ginger, nutmeg and cinnamon. The outer layer is studded with chopped walnuts and the inside layers are filled with a luscious cream cheese frosting.

Three slices of pumpkin roll cake on parchment paper

This pumpkin cake roll with cream cheese frosting has a beautiful density to it that softens while chilling in the fridge. 

You’ll want to chill the filled cake roll for at least 4 hours and up to 48 hours.

The longer chilling time allows for the cream cheese filling to set, making it much easier to slice and not have all that luscious filling oozing out.

So, if you need a wonderful make ahead dessert then this cake roll has your name on it!

Here’s what you’ll need to get started!

Ingredients for Pumpkin Roll Cake

  • 3 large eggs, room temperature
  • 3/4 cup all purpose flour
  • 1 teaspoon baking powder
  • 2 teaspoons ground cinnamon
  • 1 teaspoon ground ginger
  • 1/2 teaspoon ground nutmeg
  • 1/2 teaspoon salt
  • 1 cup granulated sugar
  • 2/3 cup canned pumpkin purée
  • 1 teaspoon lemon juice
  • 1 cup finely chopped walnuts
  • 8-ounce package cream cheese, softened
  • 1/3 cup butter, softened
  • 1 1/2 teaspoon vanilla
  • 1 1/2 cup powdered sugar plus a little more for dusting over the cake

How to make a Pumpkin Roll Cake

Grease a 15x10x1 inch baking pan.

Line the bottom of the pan with parchment paper and grease the paper. This step will allow the cake to release from the baking sheet effortlessly (do not skip this step). Set aside.

Preheat the oven to 375*F.

Whisking dry ingredients for cake in a glass bowl

In a small bowl combine the dry ingredients together. The flour, baking powder, cinnamon, ground ginger, salt, the ground nutmeg and stir well then set aside. 

Mixing pumpkin puree in a glass bowl

In a separate large bowl beat the eggs on high speed for about 5 minutes until thickened.

Lower to medium speed and gradually add the sugar, beating until it is light in colour and fluffy.

Stir in the pumpkin purée and the lemon juice.

Pumpkin cake batter in a glass bowl.

Next, beat in the flour mixture just until combined.

Sheet pan cake topped with chopped walnuts

Spread the batter evenly in the prepared pan using an offset spatula. Sprinkle the finely chopped walnuts evenly over the batter.

Bake in the preheated oven for about 12 to 15 minutes or until the cake springs back when touched.

Rolling up a cake with a kitchen towel.

Meanwhile, lay out a clean kitchen towel and sprinkle generously with icing sugar.

This will ensure that the cake does not stick to the dish towel and will give the cake a pretty appearance.

Let the pumpkin roll cake cool completely.

Sheet pan cake filled with frosting

When ready to fill the cake, unroll from the kitchen towel and spread generously with the cream cheese frosting.

How do I keep my Pumpkin Roll Cake from cracking?

It’s imperative that you roll the cake fresh from the oven as this will ensure no cracks in the layers.

When the cake is done, immediately loosen the edges with a knife and invert it onto the clean kitchen towel (nuts side down) and peel off the parchment paper. 

Starting at the short end, roll the cake in the towel and transfer to a wire rack and cool for 30 minutes to set the shape.

For the filling, in a medium mixing bowl, beat the cream cheese, butter and vanilla on medium speed until it is smooth and then gradually beat in the powdered sugar.

Unroll the cake and spread the filling in a thin layer within 1 inch of the borders.

A rolled up cake filled with cream cheese frosting

Firmly roll up the cake using the towel to help if needed. Cover the pumpkin cake roll with plastic wrap and chill for 4 to 48 hours.

When ready to serve, dust with powdered sugar and trim off edges.

A walnut and pumpkin cake rolled up and filled with frosting

Then simply slice and serve!

Slices of pumpkin cake on parchment paper

blank

Slices of pumpkin cake on a white counter

What other recipes can I make with Pumpkin Purée?

  • Pumpkin Apple Streusel Muffins
  • Pumpkin Ricotta Zeppole (Italian Doughnuts)
Four slices of pumpkin and walnut cake
Print Recipe
0 from 0 votes

Pumpkin Roll Cake

A show stopping Pumpkin Roll cake with all the wonderful aromas of Fall spices, studded with walnuts and filled with a luscious cream cheese frosting.
Course: Dessert
Cuisine: American
Keyword: Pumpkin Cake Roll
Servings: 10 to 12
Calories: 344kcal

Ingredients

  • 3 large eggs room temperature
  • 3/4 cup all purpose flour
  • 1 teaspoon baking powder
  • 2 teaspoons ground cinnamon
  • 1 teaspoon ground ginger
  • 1/2 teaspoon ground nutmeg
  • 1/2 teaspoon salt
  • 1 cup granulated sugar
  • 2/3 cup canned pumpkin purée
  • 1 teaspoon lemon juice freshly squeezed
  • 1 cup finely chopped walnuts

Cream Cheese Frosting

  • 1 8 ounce package cream cheese softened
  • 1/3 cup butter softened
  • 1 1/2 teaspoon pure vanilla extract
  • 1 1/2 cup powdered sugar

Instructions

  • Grease a 15x10x1 inch baking pan.
  • Line the bottom of the pan with parchment paper, grease the top of the paper and set aside.
  • Preheat the oven to 375*F.
  • In a small bowl, stir together the flour, baking powder, cinnamon, ginger, nutmeg, salt and set aside.
  • In a large mixing bowl beat the eggs on high speed for about 5 minutes until thickened.
  • Lower to medium speed and gradually add the sugar, beating until it is light in colour and fluffy.
  • Stir in the pumpkin and the lemon juice.
  • Next, beat in the flour mixture just until combined.
  • Spread the batter evenly in the prepared baking pan using an offset spatula.
  • Sprinkle the finely chopped walnuts evenly over the batter.
  • Bake in the preheated oven for about 12 minutes or until the cake springs back when touched.
  • Meanwhile, lay out a clean kitchen towel and sprinkle generously with icing sugar. (This will ensure that the cake does not stick to the dish towel and will give the cake a pretty appearance.)
  • When the cake is done, immediately loosen the edges with a knife and invert it onto the clean kitchen towel (nuts side down) and peel off the parchment paper.
  • Starting at the short end, roll the cake in the towel and transfer to a wire rack and cool for 30 minutes to set the shape.

Cream Cheese Frosting

  • For the filling, in a medium mixing bowl, beat the cream cheese, butter and vanilla on medium speed until it is smooth and then gradually beat in the powdered sugar.
  • Unroll the cake and spread the filling in a thin layer within 1 inch of the borders.
  • Firmly roll up the cake using the towel to help if needed.
  • Cover the pumpkin cake roll and chill for 4 to 48 hours.
  • When ready to serve, trim off edges and dust with powdered sugar.
  • Slice into equal portions and enjoy.

Notes

Recipe adapted from BHG Magazine.
 

Nutrition

Calories: 344kcal | Carbohydrates: 49g | Protein: 5g | Fat: 15g | Saturated Fat: 5g | Cholesterol: 72mg | Sodium: 194mg | Potassium: 156mg | Fiber: 2g | Sugar: 39g | Vitamin A: 2812IU | Vitamin C: 1mg | Calcium: 49mg | Iron: 1mg

This post was originally published Oct. 10, 2015 and republished Nov. 9, 2019 with updated photos and content.

Filed Under: Cakes, Dessert Tagged With: cake, cake roll, Canandian holiday, cream cheese, dessert, pumpkin, sweet, Thanks-giving, walnut

Pear Honey Rosemary Bundt Cake

September 28, 2019 by Marisa 40 Comments

Pear Honey Rosemary Bundt Cake.

This simple and deliciously moist Pear Honey Rosemary Bundt Cake is a fall inspired dessert that is just perfect for any day of the week.

The earthy flavour of rosemary lends itself well in combination with the sweet pears and honey. There is just a small amount of this woodsy herb…enough to awaken your taste buds to its subtle fragrance.

A sliced pear and honey bundt cake on a black serving platter.

This Pear Honey Rosemary Bundt Cake Recipe was originally published September 21, 2016 and republished September 28, 2019 with updated photos and content.

Papa’s pear tree stands proudly in his garden and continues to thrive.

Since his passing, one of the things I miss the most besides his absence…is his garden.

The rows upon rows of plump red juicy tomatoes, sweet bell peppers and glossy purple eggplants.

There were also fig trees with their luscious sweet fruits and a wonderful variety of lettuces and fine herbs.

It was a wonderfully tended garden!

Fresh ripe pears on a black serving tray.

So when my sister gave me loads of these ripe pears from my papa’s tree, I immediately realized that I had more then we could possible consume in a week.

I then came across this Pear Honey Rosemary Bundt Cake from the Bake from scratch magazine. I was immediately intrigued as I had never baked with rosemary before.

We start with a buttery pear compote infused with the chopped rosemary.

The lovely aromatic compote is then cooled and stirred into the cake batter and baked till golden brown in colour.

A pear and rosemary compote in a small glass bowl

Cake batter in a bundt pan.

Freshly baked pear and honey cake in a baking pan.

A Fabulous Fall Dessert

This bundt cake is simple and pretty with a slightly dense texture. And…oh…so moist!

You’ll find that it actually tastes better the next day which makes it a perfect make ahead cake.

That’s so worth considering when planning a large family gathering as this frees up much needed oven space.

And then all that’s needed before serving is a light or generous dusting of powdered sugar for a little extra love and you’ll have a fabulous Fall dessert!

Pear cake with honey and rosemary on a black platter.

Pear cake dusted with powdered sugar.

How to make a pear and rosemary compote 

  • In a medium sized sauce pot, melt 2 tablespoons of butter over medium heat.
  • Add in the chopped pear, rosemary and cook for a few minutes until the pears are soft, while stirring occasionally.
  • Remove the pear and rosemary mixture from the heat and let it cool completely.
  • It’s so simple yet so flavourful!

Pear Honey Rosemary Bundt Cake.

Sliced pear cake scented with rosemary.

How to Remove a Bundt Cake From Its Pan

  • As a good practice always grease and flour your bundt pans and I’ve got some great tips on how to prep your Bundt pans for baking on my Ciambella, Italian Lemon Sponge Cake recipe.
  • Once your cake is baked, allow it to cool in its pan while resting on a cooling rack for 10 minutes. If you let it sit too long in the pan, it will start to stick from the dampness as its cooling off.
  • Before inverting the cake, loosen the edges with a butter knife or thin rubber spatula if needed.
  • Invert the cake onto a cooling rack and gently tap around the pan with a wooden spoon to loosen the cake further.
  • Lift the pan off the cake and allow the cake to cool completely before dusting with the powdered sugar.

Three slices of pear and honey cake on parchment paper.

If you love herbs in sweet baked goods then this Pear Honey Rosemary Bundt Cake is definitely for you!

Other Fabulous Fall Inspired Desserts You’ll Love:

  • Chocolate and Pear Crostata
  • Olive Oil Apple Cake
  • Apple Rose Cake
  • Rustic Italian Apple Cake
  • Italian Plum Almond Streusel Cake

Happy baking everyone!

This Pear Honey Rosemary Bundt Cake Recipe was originally published September 21, 2016 and republished September 28, 2019 with updated photos and content.

Pear Honey Rosemary Bundt Cake.
Print Recipe
0 from 0 votes

Pear Honey Rosemary Bundt Cake

A deliciously moist pear Bundt cake, scented with honey and rosemary.
Course: Bundt Cake
Cuisine: American
Keyword: Pear Honey Rosemary Bundt Cake
Servings: 12
Author: Marisa

Ingredients

  • 1 cup plus 2 tablespoons unsalted butter softened and divided
  • 2 cups peeled and chopped pear
  • 2 teaspoons chopped fresh rosemary
  • 1 and 1/2 cups granulated sugar
  • 1 teaspoon vanilla extract
  • 3 large eggs
  • 2 and 1/2 cups all purpose flour
  • 1 teaspoon baking soda
  • 1 teaspoon kosher salt I used fine sea salt
  • 1/2 cup whole milk
  • 1/2 cup honey
  • Icing sugar for dusting

Instructions

  • Preheat oven to 325 degrees F.
  • Grease and flour a 10 cup Bundt pan and set aside.
  • In a medium sized sauce pot, melt the 2 tablespoons of butter over medium heat.
  • Add in the chopped pear, rosemary and cook for a few minutes till the pears are soft, stirring occasionally.
  • Remove the pear and rosemary mixture from the heat and let it cool completely.
  • In a large bowl using a stand mixer or hand held mixer, beat the remaining 1 cup of butter, granulated sugar, and vanilla at medium speed till fluffy. About 4 minutes.
  • Add in the eggs one at a time, mixing well after each addition.
  • In a separate medium sized bowl, whisk together the flour, baking soda and the salt.
  • In another smaller bowl combine the milk and honey together and whisk well.
  • Slowly add in the flour mixture to the butter mixture, alternating with the milk mixture. Start and end with flour mixture, beating just until combined.
  • Stir in the pear and rosemary mixture.
  • Transfer the batter to the prepared pan.
  • Bake for about 1 hour or until a wooden skewer inserted in the middle comes out with a few moist crumbs.
  • Let cool in the pan for about 10 minutes.
  • Slightly loosen the cake around the edges with a knife or offset spatula and invert onto a wire rack.
  • Let the cake cool completely and dust with icing sugar just before serving.

Notes

Adapted from Bake from scratch Magazine


Filed Under: Bundt Cakes, Dessert Tagged With: Bundt cake, cake, dessert, honey, pear, rosemary, sweet

Ciambella Italian Lemon Sponge Cake

September 13, 2019 by Marisa 16 Comments

Ciambella, Italian lemon sponge cake.

Ciambella Italian Lemon Sponge Cake is a traditional Italian ring shaped cake. It’s so incredibly light with an airy fluffy crumb and infused with both the juice and zest of lemons. It makes for one very simple yet elegant dessert recipe.

Ciambella, Italian lemon sponge cake.

Italians are notoriously known for their dolci, or rather sweet treats. Especially those yummy morsels that we leisurely love to dip in a steaming cup of coffee, tea or even milk.

It’s customary for us to break our morning fast with a biscotto, cornetto (little horn) which is not unlike a French croissant or even a brioche.

After all, aren’t mornings made for this?.

And, have I mentioned how much we love our sweets?

Lemon cake batter in a bundt pan.

What is a Ciambella?

Ciambella is essentially referred to any round ring shaped cake, doughnut or even tiny ring cookies such as these lemon glazed Ciambelle Cookies. And also these rope shaped Ciambelline al Vino Italian Wine Cookies.

Some would also call it Ciambellone, referring to its larger shape.

Freshly baked cake cooling down in bundt pan.

In terms of simplicity it probably doesn’t get much easier than this to make.

It’s all with ingredients you most likely already have on hand and you can whip up at a moments notice.

Ingredients for a Ciambella, Italian Lemon Sponge Cake

  • Flour
  • sugar
  • eggs
  • milk
  • lemons
  • baking powder
  • vanilla extract

So simple right?

Lemon cake straight out of bundt pan.

How to prepare a bundt pan for an Italian sponge cake

Decorative cake pans can elevate a simple sponge cake to one of pretty elegance that would grace any table quite beautifully.

However, with all their intricate patterns and nooks and crevices, it can be quite a chore to release the cake with its pretty shape all intact.

I love, love decorative Bundt pans but although they have a non stick finish I always grease them.

One product I always use is Cake Release from Wilton. This is not a sponsored post and I’m not compensated in any way.

It has the consistency of softened butter and a little goes a long way.

  • I use a pastry brush so that all the sides and crevices are properly coated. You’ll want to brush the centre cone as well.
  • Hold up the pan near a light source just to make sure you don’t miss a spot. Trust me, I’ve learned this the hard way.
  • With the Cake Release product I don’t need to flour my pan.
  • If your choice of coating is melted butter, then consider using a pastry brush just the same for even distribution and then lightly dust with flour.
  • Make sure to tap any excess flour out over your kitchen sink. You don’t want any sticky flour residue over your cake.

Having said that, if you have another foolproof method that works for you, then use that and maybe share it in the comments below.

I’d love to hear from you!

Happy Baking!

Sliced sponge cake on a white plate.

Other simple decorative Bundt cakes you might enjoy:

  • Olive Oil Apple Cake
  • Pear Honey Rosemary Bundt Cake
Ciambella, Italian lemon sponge cake.
Print Recipe
3 from 2 votes

Ciambella, Italian Lemon Sponge Cake

Ciambella, an Italian Lemon Sponge Cake baked in a decorative bundt pan. It's light, fluffy and wonderfully infused both the juice and zest of lemons.
Course: Dessert
Cuisine: Italian
Keyword: Ciambella, Italian Lemon Sponge Cake
Servings: 12
Calories: 376kcal
Author: Marisa

Equipment

  • Bundt Pan

Ingredients

  • 2 1/2 cups all purpose flour
  • 1 tablespoon baking powder
  • 4 large eggs
  • 1 1/2 cups granulated sugar
  • 1 cup vegetable oil
  • 1/2 cup water
  • 2 teaspoon vanilla extract
  • lemon zest from 2 lemons
  • 1/4 cup lemon juice freshly squeezed
  • powdered sugar for dusting over the cake

Instructions

  • Preheat oven to 350 degrees F.
  • Grease a bundt pan and set aside.
  • In a small bowl, sift together the flour and baking powder. Set aside.
  • In a large bowl beat together the eggs with the sugar on medium high for about 2 minutes or until creamy and pale in colour.
  • Add the flour mixture to the egg mixture and beat well for another 2 minutes while stopping to scrape down the bowl if using a stand mixer.
  • Add in the oil, water, vanilla, lemon zest and juice.
  • Beat well until smooth and the batter falls into a ribbon like flow when the beaters are lifted.
  • Pour the batter into the prepared bundt pan.
  • Bake for about 40 to 45 minutes or until the top is golden brown in colour and firm to the touch.
  • Alternately, you can insert a toothpick to check for doneness.
  • If the wooden toothpick inserted inside comes out clean, you'll know the cake is done.
  • Let the cake cool in the bundt pan for 10 minutes.
  • Loosen the edges with an offset spatula or butter knife. Take care not to scratch the non stick finish of your bundt pan.
  • Gently invert onto a wire rack to release the cake and allow to cool completely.
  • When ready to serve dust with confectioners sugar, slice and enjoy!

Nutrition

Calories: 376kcal | Carbohydrates: 46g | Protein: 5g | Fat: 20g | Saturated Fat: 15g | Cholesterol: 62mg | Sodium: 26mg | Potassium: 157mg | Fiber: 1g | Sugar: 25g | Vitamin A: 90IU | Vitamin C: 2mg | Calcium: 57mg | Iron: 2mg

Filed Under: Cakes, Dessert Tagged With: Bundt cake, cake, dessert, Sponge Cake

Orange Marmalade Cake

May 18, 2019 by Marisa 22 Comments

Cake topped with orange marmalade.

A moist and delicious Orange Marmalade Cake scented with rosemary and anise seeds. This easy to make cake is topped with sliced roasted almonds and garnished with candied orange peel.

Orange Marmalade Cake

I have fond memories of growing up with simple desserts such as this marmalade treat.

Back then there were no fancy frills adorning Mamma’s cakes, nor were any piping skills needed to decorate any of her sweet treats for that matter.

Mamma would carefully cut the cake in half and generously brush the cut sides with a sweet liquor. The two halves were then  sandwiched together with a velvety jam or home made pastry cream. And that was it!

Simple. Rustic. And delicious.

Cake topped with orange marmalade.

I’ve made a slightly different version by slathering the top of the warm cake with pure orange marmalade jam that has extra chunks of orange.

The warm cake slowly soaks up the sweet jam rendering it ever so yummy with a slightly sticky top.

Sprinkles of roasted slivered almonds adorns this jam topped delight and compliments the finely ground almonds I used in the bather.

Then all that’s needed as a finishing touch are some candied orange rinds to use as a garnish. But this is totally optional!

Orange marmalade cake with almonds on top.

What is candied orange peel?

Candied orange peels are so incredibly easy to make and you’re literally giving your fruit a second life. There is absolutely no waste here.

They are basically orange rinds that are boiled in a simple sugar syrup and then coated in granulated sugar for preservation.

All you need are citrus peels, sugar and water.

As this was my first time making candied orange rinds and I wanted a true and tried recipe so I scoured the web and fell on Christina’s Cucina, candied citrus recipe.

Christina’s recipe uses two oranges and she has some wonderful step by step instructions so head on over there if you want to make a batch.

Cake topped with orange marmalade.

Citrus rinds for orange marmalade cake

I followed Christina’s method using one orange because I only wanted enough rinds to use as a garnish.

But I probably should have used the two oranges because they were devoured like there was no tomorrow!

You can enjoy them as a snack or use to compliment your citrus treats!

However, you can just as easily use the store bought variety for garnishing this cake or sprigs of fresh rosemary would also be lovely here.

Cake topped with sliced almonds.

One slice of cake.

This cake is a true delight and not complicated to put together. It’s moist, crumbly and so delicious!

A sheer joy to serve in the presence of family or friends gathered around the table enjoying one another’s company.

Once slice of cake

Marmalade cake ready to serve

For more delicious treats follow me on Facebook – Pinterest – Instagram – Twitter

Cake topped with orange marmalade.
Print Recipe
5 from 3 votes

Orange Marmalade Cake

A moist and delicious Orange Marmalade Cake scented with rosemary and anise seeds. This easy to make cake is topped with sliced roasted almonds.
Prep Time20 mins
Cook Time40 mins
Total Time1 hr
Course: Dessert
Cuisine: Italian
Keyword: Orange, Marmelade, Cake
Servings: 8
Author: Marisa

Ingredients

  • 1 cup almonds finely ground with 1 teaspoon of sugar
  • 1 cup all purpose flour
  • 1 teaspoon baking powder
  • 3 large eggs room temperature
  • 1 cup granulated sugar
  • 3/4 cup olive oil
  • 1/2 cup almond milk or regular milk
  • 2 tablespoons orange juice freshly squeezed
  • lemon zest from 1 lemon
  • 1 teaspoon fresh rosemary finely chopped
  • 1/2 teaspoon anise seeds
  • 1/2 cup orange marmalade use a good quality
  • 1/2 cup slivered almonds toasted
  • candied orange peel for garnish optional

Instructions

  • Grease a 9 inch springform pan and set aside.
  • Preheat the oven to 350 degrees F.
  • Add the almonds with 1 teaspoon of granulated sugar in a food processor and pulse till very finely ground.
  • In a medium size bowl whisk together the finely ground almonds, all purpose flour, baking powder and set aside.
  • In a separate large bowl, beat the eggs together with an electric mixer for about 1 minute.
  • Add in the sugar, olive oil, milk, orange juice, lemon zest, chopped rosemary and anise seeds and mix well for about another minute.
  • Add the flour mixture to the egg mixture and mix until well combined.
  • Pour the cake batter into the prepared pan.
  • Bake the cake for 35 to 40 minutes or until a toothpick inserted in the middle comes up clean.
  • The cake will be medium brown in colour when done and the top will spring back to the touch.
  • When ready remove from the oven and place the cake (while still in pan) onto a wire rack.
  • While still warm, spread the orange marmalade over the top of the cake with the back of a spoon.
  • Top with the toasted slivered almonds and allow the cake to cool.
  • When ready to serve simply release the cake from the springform pan, slice and serve
  • Garnish the slices with candied orange peel if desired or with sprigs of rosemary. Totally optional.

Notes

I strongly recommend a good quality orange jam for topping this cake, as these have a perfect balance between sweet and sour. The cheaper variety are simply too bitter and leave a sour taste. Simply my opinion!

Filed Under: Cakes, Dessert Tagged With: almonds, cake, marmalade, olive oil, orange

Next Page »

Primary Sidebar

A Little About Me

blankHi I'm Marisa! Welcome to my little corner of the web where you'll find delicious foods inspired by my Italian heritage and Canadian upbringing. So kick off your shoes, have a seat and stay awhile... Read More…

Search In My Kitchen

Copyright © 2021 · Foodie Pro & The Genesis Framework