
This exquisite Italian Spumoni Cake showcases a delicious trio of strawberry, chocolate and pistachio layered cake. The colours are inspired by the traditional Italian ice cream known as …
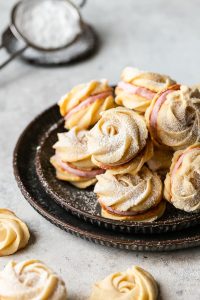
Lemon Raspberry Spritz Cookie
A Lemon Raspberry Spritz Cookie recipe your whole family will swoon over. These tender and delicious butter cookies are beautifully sandwiched together with a silky smooth and luscious raspberry …

Sandwich Cookie Pops
This past week turned out to be pretty challenging for me. It has been quite hectic in my kitchen trying to finish dozens of chocolate cake pops and these yummy sandwich cookie pops...all …
Red Velvet Cupcakes
A colleague of mine started a new tradition at work. Rather than collecting money for a birthday cake on someone's special day, the "birthday person" gets to bring a cake or treat. Since baking is …