
This exquisite Italian Spumoni Cake showcases a delicious trio of strawberry, chocolate and pistachio layered cake. The colours are inspired by the traditional Italian ice cream known as …
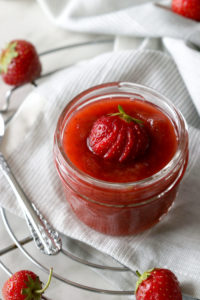
Strawberry Rhubarb Jam
A jam lover's joy, this Strawberry Rhubarb Jam is just as fun to make as it is to eat! Flavored with both the zest and juice of an orange and some freshly grated ginger for a little extra …

Mini Strawberry Grapefruit Cheesecakes
These mini strawberry and grapefruit cheesecakes, showcases one of Quebec's more delectable fruits. They are wonderfully sweet and pair perfectly with the juicy pink grapefruit segments. …
Continue Reading about Mini Strawberry Grapefruit Cheesecakes →