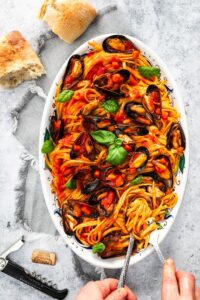
Linguine Pasta with Mussels in a spicy tomato and fennel sauce proves that with just a few simple ingredients, one can create something so delicious. You’ll find it equally suited on a casual …
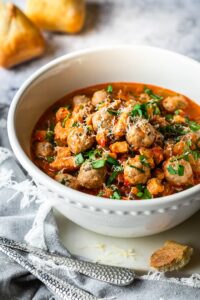
Turkey Meatball Soup
This turkey meatball soup is hearty, chock full of diced chicken breasts, mini turkey meatballs, and what my husband seriously calls "a man's soup"! It's a one-pot wonder meal bursting with tender …

Penne Pasta With Tomato Tuna Sauce
Penne Pasta With Tomato Tuna Sauce is a simple yet delicious Italian tuna and pasta dish. It's one I grew up with as a child and is still, very much a favourite to this day! It's made with just a few …
Pesto Alla Genovese (Classic Basil Pesto)
Pesto alla Genovese is a classic basil pesto sauce originating from Liguria in the north-western part of the boot. This versatile fragrant sauce is quick and easy, making mealtime stress …
Continue Reading about Pesto Alla Genovese (Classic Basil Pesto) →
Potato Gnocchi With Tomato Basil Sauce
In this dish, Potato Gnocchi with Tomato Basil Sauce, the humble potato is transformed into a melt-in-your mouth delicacy. Just about any sauce will compliment potato gnocchi. What are …
Continue Reading about Potato Gnocchi With Tomato Basil Sauce →
Parmesan Crusted Potatoes with Asparagus
Parmesan crusted potatoes with asparagus is a simple and delicious one pan side dish. It features just a few ingredients and can be prepared on any busy weeknight. My family is a huge …
Continue Reading about Parmesan Crusted Potatoes with Asparagus →