• Skip to primary navigation
  • Skip to main content
  • Skip to primary sidebar

Marisa's Italian Kitchen

The Secret Ingredient Is Always Love

  • Home
  • About
  • Recipes
  • Contact
  • Privacy Policy

Italian Food

Castagnole Fritte (Italian Carnival Fritters)

February 17, 2021 by Marisa 31 Comments

Castagnole Fritte ( Italian Carnival Fritters)

Castagnole Fritte, Italian Carnival Fritters are sweet, deep fried dough balls. These Italian-style fritters are lemon scented and rolled in granulated sugar while still warm for an extra sweet bite!

Castagnole Fritte, Italian Carnival Fritters.

Although immensely popular during Carnival season in Italy, these Italian fritters always made an appearance up until our Easter holiday.

Lemon was the choice of flavour for both my parents and the only way dad would eat them. Simply because, they evoked memories of his own mamma whipping up batches of these castagnole with their very familiar lemon scent.

They were typically served on a large platter, piled high, and these sweet carnival fritters would disappear in a flash. 

Italian Carnival Fritters

In Italy, there’s no shortage of deep fried treats during Carnival season! They’re the quintessential party snack during these festivities!  

You’ll find many variations of fluffy, deep fried dough balls. Both sweet and savoury fritters. Their names will also vary depending on which part of Italy one hails from.

Unlike the popular Zeppole doughnuts with ricotta, these castagnole fritte are leavened with yeast.

They require a teeny bit more work and of course there’s also the rising time to factor in, but they are so worth it in my opinion.

However, if a yeasted dough is not your thing then consider trying some Italian Orange Frittelle: Fried Dough Balls. There’s not much hands on time to these sweet fritters. They are orange scented and partially made with finely ground almonds.

All are soft on the inside! Slightly crunchy on the outside! And totally irresistible!

How To Make Italian Castagnole Fritte

Proofing yeast and warm water in a glass bowl.
Adding flour to proofed yeast in a glass bowl.

Step One: Place a half cup if warm water in a large bowl. Sprinkle in the yeast and let this stand until the yeast turns frothy, for about 10 minutes. Then stir to dissolve.

Step Two: Add in 1 cup of flour, a pinch of salt and stir the mixture until you have a soft batter.

Flour and yeast mixture in a glass bowl with a wooden spoon in the background.
Setting aside the castagnole dough for the first rise, in a glass bowl.

Step 3: Cover the bowl with cling wrap and set aside, for 30 minutes, in a draft free area of your kitchen.

You’ll notice that the dough will expand after the first initial 30 minutes of rising time.

Mixing in eggs, sugar, lemon zest and vanilla extract in a grey mixing bowl.
Kneaded castagnole dough in a greased glass bowl.

Step 4:  Add the remaining flour, sugar, beaten eggs, zest, butter and vanilla extract to your bowl with the proofed dough. Mix with a wooden spoon till well incorporated. Then transfer the dough to a work surface and knead by hand for about 6 minutes.

You can also knead the dough directly in the bowl of a stand mixer with the hook attachment for about 3 minutes.

When ready it will pull away from the sides of the bowl and will be soft, smooth and slightly tacky.

Step 5: Transfer the dough to a lightly greased bowl and cover with cling wrap. Let the dough rise in a warm draft free area for about 1 and a half to 2 hours. Or until doubled in size.

Castagnole dough doubled in size after the second rise in a glass bowl placed over a wooden board.
Kneading by hand the castagnole dough on a brown wooden board.

Step 6: Once Doubled in size, transfer the dough onto a work surface, lightly press it down with your hands and knead the dough for about 1 minute.

Castagnole dough cut into quarters place on a brown wooden board.
Castagnole dough rolled out and cut into one inch pieces on a dark brown cookie sheet.

Step 7: Divide the dough into 4 equal pieces. Roll each piece of dough out into an 18 inch long rope. Then slice each long rope into 1 inch pieces and transfer the cut pieces onto a lightly floured baking sheet.

You can leave the pieces as is or, to make rounder dough balls, gently roll each piece of dough between the palms of your hands.

Deep Frying Italian Sweet Dough Balls

  • Pour 2 inches of vegetable or canola oil in a stock pot.
  • Heat to 375 degrees F.
  • Deep fry the fritters till golden on all sides.
  • Remove with a slotted spoon and transfer the fried dough balls to a cookie sheet lined with paper towels to drain off any excess oil.

All that’s left to do before enjoying these sweet carnival fritters is to roll them in granulated sugar while still warm.

Deep fried castagnole fritters on a black plate. .

How Long Do Castagnole Fritte Stay Fresh

Like any deep fried doughnut, they’re at their best eaten the same day while still warm and soft because they get slightly drier after a day or two.

However, 10 seconds in the microwave will quickly soften them up again.

Italian carnival fritters on a black plate with a white bowl in the background.

How to Serve Castagnole Fritte

Although wonderful all on their own while rolled in some granulated sugar, you can also fill them with your favourite jams. Nutella or other chocolate spreads would also be a delicious choice.

  • To fill these sweet fritters start by poking a hole in the doughnut.
  • Place the jam in a piping bag that is fitted with a round tip. Pipe in up to 1 teaspoon of filling into each doughnut.

Alternately, you can also fill the doughnuts with custard or even some lemon curd.

Or opt out of the filling and top them with a drizzle of some good quality chocolate spread and don’t forget the Carnival sprinkles!

And one can never go wrong with a luscious drizzle of honey over these sweet dough balls.

Whichever way you serve them, they’re sure to disappear in a flash!

Italian fried dough balls on a small white plate topped with melted dark chocolate.

And if you love doughnuts as much as I do and have some canned pumpkin lying around, you may want to try these easy to make Pumpkin Ricotta Zeppole (Italian Doughnuts)

Happy Baking!

If you make this recipe remember to tag @marisasitaliankitchen on Instagram so I can see your creation!

This post was originally published March 23, 2016 and republished February 17, 2021 with updated photos and content.

Castagnole Fritte ( Italian Carnival Fritters)
Print Recipe
5 from 1 vote

Castagnole Fritte (Italian Carnival Fritters)

Castagnole Fritte are Italian sweet fritters. These sweet deep fried dough balls are rolled in granulated sugar and traditionally served this way but you can also fill them with jam or custard. Or simply drizzle with your favourite dark chocolate.
Prep Time30 mins
Cook Time20 mins
Course: Dessert
Cuisine: Italian
Keyword: carnival fritter, Castagnole Fritte, doughnuts, fritter
Servings: 50 doughtnuts
Calories: 58kcal
Author: Marisa

Ingredients

  • 8 g active dry yeast 1 envelope
  • 1/2 cup lukewarm water
  • 3 cups all purpose flour
  • generous pinch of salt I used fine sea salt
  • 1/2 cup granulated sugar
  • 2 large eggs lightly beaten (room temperature)
  • 2 tablespoons lemon zest from 2 medium lemons
  • 1/4 cup unsalted butter softened
  • 1 teaspoon pure vanilla extract
  • vegetable or canola oil for deep frying
  • 3/4 cup granulated sugar for rolling approximately

Instructions

  • Sprinkle the yeast in a bowl containing 1/2 cup of lukewarm water and let this sit for a 10 minutes, till frothy, then stir to dissolve.
  • Add in 1 cup of the flour, a pinch of salt and stir till you get a soft batter. Cover the bowl with cling wrap and let this sit for about 30 minutes.
  • Next, stir in the remaining flour, sugar, the lightly beaten eggs, lemon zest, butter and vanilla extract. Mix well.
  • If kneading by hand: Transfer the dough to a work surface and knead for about 6 minutes. The dough should be soft, smooth and just a little bit sticky.
  • If using a stand mixer: Knead the dough in the bowl of a stand mixer with the dough hook attachment for about 3 minutes. When ready the dough will pull away from the sides of the bowl and feel somewhat tacky.
  • Lightly grease a large bowl and place the dough in the bowl.
  • Cover with cling wrap and let the dough rise in a warm draft free place for 1 to 1 ½ hours. The dough will double in volume.
  • When ready transfer the dough to a work surface, lightly punch it down with your hands and knead it for about 1 minute.
  • Divide the dough into 4 equal pieces.
  • Keep the dough covered with a clean dishcloth while working with 1 piece of dough at a time. (this will keep the dough from drying out)
  • Roll each piece of dough out into approximately an 18 inch long rope. (keep covered with clean dish cloth)
  • Cut each rope into one inch pieces and roll each piece of dough in the palm of your hands for rounder shapes.
  • Place the dough balls onto a lightly floured baking sheet. (keep covered)
  • Pour 2 inches of oil in a medium sized sauce pan or dutch oven and heat to 375* degrees. (use a deep frying thermometer for accuracy)
  • When the oil has reached 375 degrees F, carefully drop in about 6 pieces of dough at a time. (This will also depend on the size of your sauce pan). Don't over crowd them.
  • When the fritters are golden on one side, flip over to the other side.
  • Once golden brown on both sides, use a slotted spoon and drain the castagnole on paper towels.
  • Roll the castagnole in granulated sugar turning to coat all over.
  • Serve while still warm, piled high on a serving platter.
  • For a festive Carnival appeal you can drizzle them with warm melted chocolate and top with sprinkles.

Notes

Temperature for deep frying castagnole
When deep frying the fritters try to keep the temperature of the oil at 375 degrees F. At this temperature they'll absorb minimal oil. If too hot they will over brown on the outside and will be raw on the inside.
Deep frying a small batch of 6 pieces at a time should take about 2 minutes approximately.
Reheating leftovers
As with any deep fried fritters, they're at their best served while still warm.
However, any leftovers can be heated in the microwave for about 10 seconds, a few at a time.
They'll turn out soft, fluffy and just as yummy as freshly made.

Nutrition

Calories: 58kcal | Carbohydrates: 11g | Protein: 1g | Fat: 1g | Saturated Fat: 1g | Trans Fat: 1g | Cholesterol: 9mg | Sodium: 3mg | Potassium: 13mg | Fiber: 1g | Sugar: 5g | Vitamin A: 38IU | Vitamin C: 1mg | Calcium: 3mg | Iron: 1mg


Filed Under: Dessert, Doughnuts Tagged With: castagnole, cherry, dessert, doughnuts, Italian dessert, Italian doughnuts, Italian Food, Lemon

Lemon Spaghetti with Shrimp

January 22, 2021 by Marisa 30 Comments

Lemon Spaghetti With Shrimp.

A bright and bold Lemon Spaghetti with Shrimp recipe that’s always a winner at my house!

You’ll love this dish for it’s simplicity and for how quickly it can be put together on a busy weeknight! Or even for those very special weekend dinners too!

Lemon Spaghetti With Shrimp.

This dish features succulent colossal shrimp, marinated in an Italian gremolata sauce which is quite simply a condiment. This condiment is a mixture of fresh parsley, garlic and lemon which enhances the fresh flavours.

Add a little extra virgin olive oil and you’ve got yourself a quick aromatic marinade for shrimp.

The marinated shrimp are pan seared and served over a platter of lemon parmesan pasta.

It’s so easy to put together and with a little planning and prepping ahead of time you can have dinner ready in approximately 30 minutes. 

Ingredients For Italian Gremolata

With a few simple ingredients, fresh is always best!

  • Parsley: Use Italian flat leaf parsley as it’s much more fragrant than the curly variety.
  • Garlic: Rather than chopping the garlic try mincing it for a less pungent flavour since the shrimp cook rather quickly.
  • Lemon Zest: Lemon zest adds lots of flavour. Make sure to use only the colourful part and not the pith of the lemons which is quite bitter.

A baking sheet filled with crushed ice and topped with jumbo sized black tiger shrimp.

Preparing And Marinating Black Tiger Shrimp

I used frozen, raw easy peel shrimp for this lemon shrimp pasta recipe. Frozen shrimp are always convenient to have on hand and an ideal choice for busy weeknights!

The shells are pre-cut and the shrimp are deveined for you. All you need to do is defrost the shrimp then peel back the shell while leaving the tail intact.

There are a couple of ways you can defrost the shrimp:

  • Overnight thaw: Simply place the shrimp in the fridge the night before you plan to cook with them.
  • Quick thaw: Remove the shrimp from their packaging and place the shrimp in a colander. Run cold water over the shrimp for about 6 minutes or until thawed. Then simply drain and pat dry before marinating the shrimp.

You can do this ahead of time and keep the shrimp in the fridge until you’re ready to marinate them.

Jumbo shrimp on a black plate marinated in lemon, garlic, parsley and olive oil mixture.

Cooking Black Tiger Shrimp For Lemon Pasta

Once marinated with the parsley, garlic, lemon and oil, set them aside for about 15-20 minutes. This allows the time to bring a large pot of water to a roaring boil.

The amount of time to cook the shrimp will depend on their size. Mine were the 8/12 count per pound and required about 2 minutes or so on each side.

These 8/12 count per pound are also referred to as super colossal sized shrimp, but can sometimes vary depending on the vendor.

They’re far meatier than the smaller shrimp and quite satisfying even to the carnivores in my family.

A black tray filled with pan seared black tiger shrimp.

How to Make Lemon Shrimp Spaghetti

Although these quick pan seared shrimp are magnificent all on their own, they compliment the lemon parmesan spaghetti quite deliciously.

  • Once you have your shrimp marinating in the parsley, garlic and lemon sauce, bring a large pot of water to boil.
  • This will give the shrimp sufficient time for a quick marinade while you prepare the lemon parmesan sauce for the spaghetti.
  • When the water comes to a roaring boil, salt and add in the pasta.
  • Cook the pasta according to package directions.

Twirls od spaghetti on a black plate topped with black tiger shrimp and lemon wedges on a black plate.

  • Meanwhile, heat a large skillet over medium heat.
  • Sprinkle the shrimp with salt and pepper.
  • Add the shrimp to the hot pan and sear for approximately 2 minutes on each side. This largely depends on the size of your shrimp.
  • If your skillet is small, you can cook them in batches.
  • When the pasta is ready, drain and toss with the lemon sauce.

A black plate filled with lemon spaghetti and shrimp with a forkful of spaghetti twirled around the fork.

There are two ways to bring this magnificent dish to the table!

You can transfer the lemon spaghetti onto a serving platter and top the pasta with the pan seared shrimp, a sprinkle of chopped fresh parsley and a little drizzle of extra virgin olive oil. And let your family help themselves!

Or you can plate individual servings, topped with an equal amount of the lemon garlic shrimp, a dash of chopped parsley and a slight drizzle of the olive oil. This way there’s no infighting amongst siblings!

A serving of lemon spaghetti on a white plate topped with 3 lemon garlic shrimp.

Servings for lemon shrimp pasta:

Twirling the spaghetti as in the photo will easily yield 6 portions, measuring approximately 1 1/2 cups cooked pasta per serving. I find this more than enough when serving a multiple coarse meal.

However, when served as a main dish with a salad on the side, you will have 4 very generous portions indeed!

Make it tonight and impress friends and family with this relatively easy to make, shrimp over pasta dish.

And, if you love shrimp pasta dishes as much as I do, you might also enjoy this Spaghettoni with Shrimp and Peppers recipe

Happy Cooking!

Pan seared shrimp topped over lemon pasta noodles on a black plate.

This recipe was originally published April 6, 2016 and republished January 22, 2021 with updated photos and content.

Twirls od spaghetti on a black plate topped with black tiger shrimp and lemon wedges on a black plate.
Print Recipe
5 from 1 vote

Lemon Spaghetti with shrimp

A bright and bold lemon spaghetti dish with jumbo garlic, lemon shrimps.
Prep Time30 mins
Cook Time11 mins
Course: Main
Cuisine: Italian
Keyword: Lemon Spaghetti with Shrimp
Servings: 4 to 6
Author: Marisa

Ingredients

GREMOLATA MARINADE FOR SHRIMP

  • 908 grams large shrimp shelled and deveined
  • 1/3 cup extra virgin olive oil
  • lemon zest from 2 lemons
  • 1/2 cup chopped parsley
  • 4 cloves of garlic minced
  • sea salt and freshly ground pepper

LEMON PASTA SAUCE

  • 454 grams spaghetti
  • 1/2 cup extra virgin olive oil
  • 1/3 cup lemon juice
  • lemon zest from one lemon
  • 1/2 cup Parmigiano-Reggiano cheese
  • 1/2 cup chopped parsley
  • salt and pepper to your taste I used fine sea salt

Instructions

PREP SHRIMP GREMOLATA MARINADE

  • In a bowl toss together the shrimp, extra virgin olive oil, lemon zest, chopped parsley and minced garlic.
  • Set aside to marinate at room temperature for about 20 minutes.

FOR THE PASTA

  • Meanwhile bring a large pot of salted water to a boil.
  • When water reaches a rapid boil, salt the water and toss in the spaghetti. Cook according to package instructions.

WHILE THE PASTA COOKS

  • While the pasta cooks, heat a large skillet over medium high heat.
  • Sprinkle the shrimp with salt and pepper and cook in a single layer, for about 2 minutes on each side, depending on the size of the shrimp.
  • Also, depending on the size of your pan, you may have to cook the shrimp in 2 batches.
  • Once the shrimp are cooked transfer them to a plate and set aside.

LEMON PASTA SAUCE

  • Whisk together the 1/2 cup extra virgin olive oil, 1/3 cup lemon juice and zest, freshly grated cheese, parsley and a dash of salt and pepper.
  • Drain the spaghetti, reserving about 1 cup of pasta water.
  • Return the drained pasta to the pot.
  • Pour the lemon sauce over the drained pasta and toss to combine.
  • Add a little bit of the reserved pasta water if needed.
  • You'll want to add just enough of the reserved pasta water to moisten the spaghetti.
  • Toss well.
  • Transfer the spaghetti onto a serving platter and top with the pan seared shrimp.
  • Sprinkle with a dash of chopped parsley and a drizzle of extra virgin olive oil.
  • You can bring the assembled platter to the table and let everyone help themselves or make individual servings topped with an equal amount of shrimp, a drizzle of extra virgin olive oil and garnished with parsley.
  • And pass the cheese if you wish. I'm all for extra cheese!

Filed Under: Pasta Tagged With: 30 minute meals, authentic italian, Italian Food, Lemon, shrimp, spaghetti, supper

Arancini Italian Rice Balls

September 21, 2020 by Marisa 8 Comments

Three arancini on a white plate, served with a marinara sauce.

Arancini Italian Rice Balls are so utterly delicious and irresistible! This arancini recipe is made with Italian arborio rice which is a short-grain rice with a high starch content. The centres are filled with both diced prosciutto and mozzarella. They’re then rolled in breadcrumbs and deep fried to a golden brown perfection!

Arancini Italian Rice Balls.

What are Arancini

Arancini, or more specifically arancini di riso are round and plump orange hued, deep fried rice balls. The exterior is light and crispy with creamy soft centres, much like a good risotto. They’re an extremely popular street food throughout Italy and a true comfort food!

The word arancini simply means “little oranges” because really that’s what they resemble after they’re finished frying.

In the Lazio region where I was born, they are known as “Suppli al Telefono.” Named for the melting and oozing strands of mozzarella which are said to look like telephone lines strung from pole to pole.

They’re pure bliss and loved by everyone!

Seriously though, just one bite and you’ll know what I mean!

How to Make Arancini Italian Rice Balls

Diced onions on a black plate. arborio rice in a white bowl, sliced garlic and olive oil in separate little bowls.

You’re probably asking yourself, are they hard to make? And no they’re not! You’ll find them easier to make than they look. However, they do require a few easy steps and a little patience to assemble. But, so worth the effort in my opinion.

You can absolutely make them with leftover rice if ever you have some from a previous meal.

However, at my house that simply never happens and so I always start with a fresh batch of cooked rice.

STEP 1: Cooking Rice from scratch

  • Sauté the chopped onions in some olive oil with the sliced garlic and bay leaves. For about 3 minutes or just until the onions are translucent.
  • Stir in the rice.
  • Add the chicken stock, bring to a boil and then simmer for about 20 minutes or until the rice has absorbed all the liquids.
  • Allow the rice to cool before continuing with the next step.

Cooked arborio rice on a white plate with grated cheese on a black plate and cracked eggs in a white bowl.

STEP 2: Mix in cheese and eggs

  • Once the rice has cooled, discard the bay leaves. 
  • Stir in the grated cheese with the beaten egg and egg yolk.

Cooked arborio rice on a white plate with diced mozzarella and prosciutto in a small white bowl. Bread crumbs on a black plate with beaten egg whites in a white cup.

STEP 3: Assemble arancini balls

  • Use an ice-cream scoop or 1/4 cup measure to divide the rice mixture into 12 equal portions. Transfer to a baking sheet.
  • With moistened hands, form one portion at a time into a ball. Cup the rice ball in the palm of one hand and make an indentation in the middle.
  • Fill the centre with approximately 1 teaspoon of the prosciutto and mozzarella mixture.
  • Close your hand, making a fist and gently roll back into a ball.
  • Roll the balls one at a time, first in the flour then in the egg whites and finely in the bread crumbs. Turn to coat all over.
  • Place them back on the cookie sheet and chill for 30 minutes.

Rice balls dipped in egg white and breadcrumbs.

STEP 4: Deep frying 

  • Fill a dutch oven or a stock pot with vegetable oil measuring 2 inches deep. (I used a dutch oven of a 3L capacity)
  • Heat the oil to 350 degrees F.  (use a deep frying thermometer for accuracy)
  • Use a large slotted spoon or wire skimmer to gently lower the balls into the hot oil. (don’t over crowd them)
  • Fry the balls for about 2 minutes or till golden brown and crispy all over.
  • Use a wire skimmer or slotted spoon to gently remove them from the hot oil and place them on cookie sheet lined with paper towels to absorb any excess oil.

Deep fried rice balls.

They can be served either hot or cold but I much prefer them hot. Especially when they’re stuffed with mozzarella. This way when you cut into one you’ll have ooey-gooey, cheesy strands of mozzarella happening. Delish!

Not only do they make yummy appetizers, entrées or snacks but they’re also equally wonderful served for lunch or supper with a crispy side salad.

My absolute favourite way to serve these Arancini, Italian Rice Balls is with a delicious Marinara Sauce. Or you can simply use your own favourite Tomato Sauce.

Deep fried rice balls on a black cooling rack placed over a black plate.

Variations for Rice Balls Recipe

  • Another filling is a Sicilian-style type one with meat ragù and peas.
  • Even a vegetable filled one is quit yummy.
  • Or simply no filling at all, however I would not leave out the mozzarella!

Three arancini on a white plate, served with a marinara sauce.

Tips

  • Use a short grain rice with a high starch content such as arborio rice which will stick together better.
  • You can use leftover rice or simply make a fresh batch up to one day ahead.
  • Shape, stuff and roll the balls in flour, beaten egg whites and bread crumbs up to one day ahead.
  • You can prep and deep fry them one day in advance before serving.
  • When made in advance, reheat in a preheated oven at 350 degrees F for about 12 minutes till crispy on the outside.
  • They can also be reheated in the microwave however they’ll lose their outside crispness but still be yummy.

Three rice balls on a white plate and one rice ball is cut into showing the cheesy centres.

They’re always a great crowd pleasing treat. And simply wonderful to take along on your next potluck or family gathering!

They have the most creamy soft centres with melted strands of mozzarella and a crunchy outer layer. Your family will be clamouring for more!

Happy cooking!

This post was first published April 20, 2015 and republished September 21, 2020 with updated photos and content.

Arancini Italian Rice Balls.
Print Recipe
3 from 1 vote

Arancini, Italian Rice Balls

These Arancini, Italian Rice Balls are so utterly delicious and irresistible! They are stuffed with prosciutto and mozzarella, rolled in breadcrumbs and then deep fried to a golden brown perfection!
Prep Time1 hr
Cook Time20 hrs
Chill time30 mins
Course: Lunch Supper Snack
Cuisine: Italian
Servings: 12
Calories: 283kcal
Author: Marisa

Equipment

  • 3L stock pot or dutch oven
  • Thermometer for deep frying

Ingredients

Ingredients to cook the rice from scratch

  • 1 tablespoon olive oil
  • 1 medium onion chopped
  • 1 clove of garlic sliced thinly
  • 3 bay leaves
  • 1 cup Arborio rice
  • 2 ½ cups low sodium chicken stock

Ingredients to mix into the cooked rice

  • 1/2 cup Parmegiano-Reggiano cheese
  • 1 large whole egg lightly beaten
  • 1 large egg yolk lightly beaten

Filling for the rice balls

  • 1/2 cup mozzarella cheese chopped
  • 1/2 cup prosciutto chopped

Ingredients to roll the rice balls into

  • 1 cup all-purpose flour
  • 3 large egg whites beaten with a fork
  • 2 cups Italian bread crumbs
  • vegetable oil for deep frying

Instructions

Cooking the rice from scratch

  • In a medium saucepan, heat the olive oil over medium heat.
  • Add the chopped onion, garlic, bay leaf and sauté for about 3 minutes or just until the onion is soft and translucent.
  • Stir in the rice.
  • Add the chicken stock and bring to a boil then lower to a simmer.
  • Cook the rice until tender and all the liquid has absorbed, for about 20 minutes.
  • Remove the bay leaf and discard it.
  • Once the rice is cooked, transfer to a bowl and cool completely.
  • When cooled stir in the grated Parmesan cheese, beaten egg and egg yolk.

Shaping and filling the balls

  • Divide the mixture in 12 equal portions and place the portions on a small tray. Having these portions ready will make it easier to fill the rice balls.
  • Keep a small bowl filled with water close by and from time to time moisten your hands for easy rolling of the rice balls. This step will greatly minimize any fuss and mess when rolling the balls. Trust me and you can thank me later!
  • Combine the prosciutto and mozzarella together in a small bowl.
  • With moistened hands, scoop up 1/4 cup of the rice mixture and cup it in one hand. Use your other hand to flatten it slightly while making an indentation. Place about a teaspoon of the mozzarella and prosciutto mixture in the middle. Close your hand, making a fist and gently roll into a ball. If needed, you can always add more rice.
  • Place the rice ball on a greased cookie sheet and repeat with the remaining rice and filling to form 12 rice balls.
  • Moisten your hands with water as often as needed for easy rolling. This will prevent the rice from sticking too much on your hands and you will be able to roll the rice balls effortlessly.

Rolling the balls in flour, beaten egg whites and bread crumbs

  • Roll the rice balls, one at a time, first in the flour then in the egg whites and finely in the bread crumbs while turning to coat all over and place them back on a cookie sheet.
  • Cover with plastic wrap and then chill for 30 minutes.

Getting ready to deep fry

  • In the meantime, line a cookie sheet with paper towels and place it next to your stove.
  • Heat the vegetable oil in a dutch oven or a deep frying pan (the oil should measure about 2 inches deep), to 350*F. Use a deep frying thermometer for accuracy. Make sure there is enough oil in the pan to ensure they cook evenly and to avoid any from bursting.
  • Use a wire skimmer or a large slotted spoon to gently lower the rice balls into the hot oil. Do not overcrowd them.
  • Fry the rice balls for about 2 minutes or until golden brown and crispy all over. You can also keep them warm in the oven preheated to 200*F while you fry up the rest.
  • When ready, remove with the wire skimmer or your slotted spoon and place them on the prepared cookie sheet to drain.
  • Repeat with the remaining rice balls.
  • Serve while hot alongside a crispy salad or wth your favourite tomato sauce.

Nutrition

Calories: 283kcal | Carbohydrates: 37g | Protein: 12g | Fat: 10g | Saturated Fat: 3g | Cholesterol: 43mg | Sodium: 465mg | Potassium: 178mg | Fiber: 2g | Sugar: 2g | Vitamin A: 144IU | Vitamin C: 1mg | Calcium: 119mg | Iron: 3mg


Filed Under: Rice, Salads & Side Dishes Tagged With: Arancini, Italian Food, mozzarella cheese, prosciutto, Rice, Rice Balls

Potato Gnocchi With Tomato Basil Sauce

May 7, 2020 by Marisa 42 Comments

Potato gnocchi with tomato basil sauce.

In this dish, Potato Gnocchi with Tomato Basil Sauce, the humble potato is transformed into a melt-in-your mouth delicacy. Just about any sauce will compliment potato gnocchi.

Potato gnocchi with tomato sauce in a black skillet.

What are Gnocchi?

Gnocchi are simply the Italian version of potato dumplings and can be prepared in limitless ways.

Today, there is such an extensive variety of gnocchi! Some are made with ricotta or squash while others are flavoured with beets.

There are also gnocchi where different flours are utilized, such as chestnut, buckwheat and also wholewheat flour.

Another version is made with semolina flour, milk, cheese and known as Gnocchi alla Romana.

Gnocchi in a skillet topped with Parmesan cheese

These Potato Gnocchi with Tomato Basil Sauce, however, is the type of dish I grew up with.

They were my number one request each time mamma would ask me what I wanted to eat for my birthday celebration. She never failed to remind me of the countless times I would help her twirl the gnocchi with my chubby little fingers!

How To Make Potato Gnocchi From Scratch

An oven baked potato being peeled on a cutting board.
Baked potato put through a potato ricer.

Start with a starchy potato such as the russet potato and you can either boil them or bake them in the oven. 

Just make sure not to pierce or cut through the potato when boiling them, otherwise they will absorb too much water.

You can easily mash the potatoes with a fork but a potato ricer really does an excellent job of mashing the potatoes and it’s a good investment for one who often makes gnocchi.

Mixing potatoes and eggs for gnocchi.
Gnocchi dough on a wooden board.

Mix the mashed potatoes with the beaten egg, salt and work in some flour with your hands.

Knead the dough for a few minutes while working in a little more flour if sticking too much on your hands and work surface. It should be soft and pliable.

Quartered gnocchi dough on a brown wooden board.

How To Shape Gnocchi

Working with one piece of dough at a time, roll the gnocchi dough into a 1/2 rope then cut into 1 inch pieces.

To shape the gnocchi, you can use a handy wooden gnocchi board but if you don’t have one, no worries!

Sliced pieced of gnocchi on a cutting board.

I was taught to twirl the gnocchi using my index finger and middle finger by pressing both down into the gnocchi and rolling quickly towards me.

Alternately you can use the back of a fork to make the pretty indentations. The little ridges that form are a perfect entrapment for all that delicious sauce.

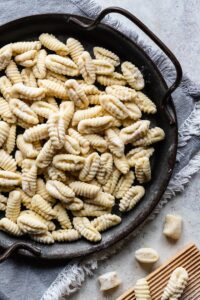
Shaped gnocchi on a gnocchi board.

Tips for Making Potato Gnocchi From Scratch

Always start with less amount of flour than the recipe calls for. The moisture of your potatoes and the amount of eggs used will determine how much flour is needed.

Do not knead more than a few minutes as this would result in too much flour adsorption which yields heavier gnocchi.

It goes without saying to always use a big sauce pot when cooking any form of pasta. Drop a few at a time into the boiling water to avoid the gnocchi from sticking together.

Ideally you will want to make and cook the gnocchi within a few hours. Simply transfer the gnocchi in a single layer on a lightly dusted cookie sheet and cover with a clean dish towel till ready to use.

Gnocchi can also be frozen. Transfer them on a cookie sheet in a single layer and place the tray in the freezer. Once frozen, transfer them into a freezer bag.

A forkful of gnocchi in tomato sauce.

These exquisite potato gnocchi are very filling and therefore often served in moderate portions as a first course meal.

You’ll want to savour every bite! Enjoy the melt-in-your mouth sensation and never rush a good thing.

Above all, have fun and enjoy the process. After all practice makes perfect!

Two white plates filled with potato gnocchi in tomato basil sauce.

Potato gnocchi with tomato basil sauce.

This recipe was originally published Sept. 14 2016 and updated May 7, 2020 with new photos and content.

Potato gnocchi with tomato sauce in a black skillet.
Print Recipe
3 from 2 votes

Potato Gnocchi With Tomato Basil Sauce

In this dish, Potato Gnocchi with Tomato Basil Sauce, the humble potato is transformed into a melt-in-your mouth delicacy sure to dazzle family and friends.
Course: Main Meal
Cuisine: Italian
Keyword: Potato Gnocchi with Tomato Basil Sauce
Servings: 4
Author: Marisa

Ingredients

Gnocchi Dough

  • 4 large russet potatoes about 2 pounds
  • 1 teaspoon salt
  • 1 tablespoon beaten egg
  • 2 cups all purpose flour approximately

Tomato Basil Sauce

  • 1 tablespoon olive oil
  • 2 cloves of garlic minced
  • pinch of crushed chili pepper
  • 24 ounce jar Passata Italian strained tomatoes I used San Marzano
  • 2 sprigs of basil
  • salt and pepper to taste
  • 1/2 cup diced mozzarella
  • 1/2 cup grated Parmesan cheese

Instructions

How To make Gnocchi

  • Preheat the oven to 375 degrees F.
  • Wash the potatoes under cold running water and pat dry.
  • Use a large knife and make a deep incision length-wise into each potato.
  • Place the potatoes on a cookie sheet and bake until they are tender, for about 1 hour.
  • Let potatoes cool a little but do peel them while they are still a bit warm.
  • Put them through a potato ricer. Alternately you can use a potato masher or a fork.
  • Place the mashed potatoes in a large bowl.
  • Add in the salt, 1 tablespoon of beaten egg and 1 and 1/2 cups of flour.
  • Using your hands, mix well just until the flour and potatoes stick together forming a rough looking dough.
  • Transfer the dough to a wooden board or work surface.
  • Knead the dough lightly, gradually adding a little bit of the remaining flour if the dough is sticking too heavily on your work surface. (I did not need all of the remaining 1/2 cup more of flour)
  • Knead for 2 to 3 minutes.
  • The dough should be smooth, pliable and just a little bit sticky.
  • Cut off a section of dough at a time.
  • Roll the piece of dough with a back and forth motion until you get the thickness of your index finger.
  • Cut the roll into 1 inch pieces.
  • Repeat with the remaining dough.
  • To shape the gnocchi, I used my little wooden gnocchi board with ridges.
  • Alternately, you can use the back of a fork .
  • Hold the fork at 45 degree angle, with the tines down on the work surface with its' inside curve towards you.
  • Take a gnocchi role and press it with your index finger against the tip end of the fork while quickly sliding it up along the length of the fork tins.
  • Or simply use your index and middle fingers by pressing both fingers down into the gnocchi and rolling quickly towards you. The gnocchi will flip over and have a pretty indentation.
  • Repeat with the remaining pieces of dough.
  • Transfer the gnocchi on a lightly floured cookie sheet and cover with a clean dish towel.
  • Set aside while you prepare the sauce.

Tomato Basil Sauce

  • Heat the oil in a medium sauce pot over medium low heat and sauté the garlic with the crushed chilli pepper just until fragrant, taking care not to burn the garlic. (should take less then a minute).
  • Add in the passata (Italian strained tomatoes), basil, salt and pepper and stir well.
  • Fill the bottle of passata three quarters full with water. Give it a good swirl and add this to the sauce.
  • Bring the sauce to a boil then lower the heat, cover and simmer for about 45 minutes or until the sauce thickens and the sweet concentrated flavors of the tomatoes come through.
  • While the sauce simmers, fill a large sauce pot with water and bring to a rapid boil.
  • Add salt to the boiling water and then the gnocchi.
  • Once the gnocchi come to surface they are pretty much ready. Leave them floating for about 10 seconds. (If they stay in the water too long, they will become mushy).
  • Remove the gnocchi with a slotted spoon and place them on a serving platter.
  • Pour a little of the sauce over the gnocchi, stir to combine then mix in the diced mozzarella.
  • The heat of the tomato sauce will slowly melt the mozzarella.
  • Divide the gnocchi onto four plates. Top with more sauce and Parmesan cheese.
  • Serve while still hot.


Filed Under: Pasta Tagged With: authentic italian, basil, gnocchi, Italian Food, mozzarella, pasta, potato, supper, tomato sauce

Pizza with sausage and sweet peppers

March 9, 2019 by Marisa 6 Comments

Pizza with Sausage and Sweet Peppers.

A thick crust Pizza with Sausage and Sweet Peppers is my all time favourite kind of pizza. It’s topped with an easy to make homemade tomato sauce! Mildly spicy Italian sausages are scattered over the mozzarella layers. And, then topped with pan roasted sweet red bell peppers. It bakes up beautifully with a crispy outer layer. Delicioso!

Pizza with Sausage and Sweet Peppers.

This Pizza with Sausage and Sweet Peppers post was originally published February 9, 2015. It’s been updated with new photos and content and republished March 9, 2019.

Pizza has got to be one of the most popular dishes to come out of Italy. There are endless possibilities!

From thin crust to thick crust and with a large variety of cheeses to choose from as well as sauces and toppings. It’s so much fun to make and in less time than you might think.

This pizza with sausage and sweet peppers is a family favourite. The combination of mildly spicy sausage and pan roasted sweet red bell peppers is a delicious combination. The dough bakes up just beautifully! It’s soft and airy on the inside with a crunchy, crispy outer layer.

Pizza with Sausage and Sweet Peppers.

As with most traditional Italian mammas, mine would make pizza once a week for us. There was no ordering in or take out in our family! It simply was not done!

She would say “che vergogna”! What a disgrace! So now, I too make my own pizza once a week. Like… religiously!

Pizza with Sausage and Sweet Peppers.


If you have never made pizza before do give it a try. There is something so comforting from creating dough from scratch!

With just a few simple ingredients listed below, you literally have fresh homemade pizza dough in under 20 minutes.

Ingredients for Homemade Pizza Dough

  • warm water
  • extra virgin olive oil
  • all purpose flour
  • salt
  • instant yeast
  • eggs

It’s a wonderful egg based dough!

You’ll need to let it rise in a draft free place.

On a sunny day I place my bowl of pizza dough on my dinning table where the sun comes shining through. It rises beautifully and works every time ! On a not so sunny day I let my dough rise on my kitchen counter right under one of the spotlights from underneath the kitchen cabinets. This works like a charm!

Pizza with Sausage and Sweet Peppers.

Ingredients For Pizza Toppings

  • Italian sausages
  • extra virgin olive oil
  • onions
  • red bell peppers
  • mozzarella

I first brown my my meat in a skillet with a little oil, just to get them a little caramelized on the edges. Them I simply transfer the browned meat to a plate so that I can use the same skillet to pan roast the veggies. Why dirty another skillet…right?

The pan roasted sweet bell peppers and onions are hands down my favourite pizza toppings.

You can, however, simply slice the bell peppers and layer them over the pizza.

In this case I would then brown the sausage with the sliced onions in the same pan.

Either way it’s sure to be delicious!

Ingredients For Homemade Pizza Sauce

  • ground tomatoes (preferably San Marzano)
  • garlic cloves
  • fresh or dried herbs (oregano, basil and parsley)
  • salt and black pepper

The ingredients are pretty straight forward and which you probably already have on hand.

I love the San Marzano tomatoes as these are quite flavourful and sweeter then other varieties. They also have a low acidity level and really don’t have that many seeds in them.

You can use either fresh or dried herbs. Whichever is at your most convenient is quite fine.

The sauce yields approximately 3 1/2 cups. However you will only need 1 1/4 cup to top the 2 large pizzas. You can freeze the rest for future use for up to 6 months. But I’m quite confident you won’t be waiting that long to make pizza again!

Pizza with Sausage and Sweet Peppers.

So here you have my traditional Pizza with Sausage and Sweet Peppers. It’s pure comfort food at my house and we so look forward to this treat every single week!

If you make this recipe remember to tag @marisasitaliankitchen on Instagram so I can see your creation!

Pizza with Sausage and Sweet Peppers.

Pizza with Sausage and Sweet Peppers.
Print Recipe
0 from 0 votes

Pizza with Sausage and Sweet Peppers

Pizza with Sausage and Sweet Peppers and a homemade tomato sauce. This thick crust pizza is topped with Italian sausages and pan roasted red bell peppers.
Prep Time1 hr
Cook Time25 mins
Resting Time1 hr 30 mins
Total Time1 hr 28 mins
Course: Dinner
Cuisine: Italian
Keyword: homemade pizza sauce, italian sausage, pizza, sweet peppers
Servings: 2 16 inch pizzas
Author: Marisa

Ingredients

PIZZA DOUGH

  • 2 cups warm water
  • 4 tbs olive oil
  • 4 to 5 cups of all purpose flour
  • 1 tsp salt I use fine sea salt
  • 1 packet "quick rise" instant yeast I use Fleischmann's 8 grams
  • 2 large eggs

PIZZA SAUCE

  • 1 28 ounes ground tomatoes preferably San Marzano
  • 5 cloves of garlic minced
  • 2 tsp each of dried oregano, basil and parsley if using fresh, increase to 1 tbs each
  • salt and pepper to your taste

PIZZA TOPPING

  • 2 teaspoons extra virgin olive oil
  • 3 links of mild Italian sausage about 1 pound
  • 2 medium onions sliced thinly
  • 4 large red bell peppers cut to 1 inch pieces
  • 4 cups grated or shredded mozzarella cheese or as much cheese as you like

Instructions

PIZZA DOUGH

  • In a medium size bowl, stir together 3 cups of the flour, salt and the yeast.
  • Heat 2 cups of water with 4 tbs of olive oil in the microwave for 60 to 90 seconds. Take note that if your water is not warm enough the yeast will not activate. If it's too hot it will kill the yeast.  
  • Stir the warm liquids in the flour mixture with a wooden spoon. 
  • Add in the 2 eggs and stir till very well combined.
  • Stir in another cup of flour.
  • Transfer the dough onto a well floured work surface and knead for about 5 minutes working in the last cup of flour a bit at a time just until the dough is soft and smooth. You may not even need the whole last cup of flour.
  • Grease a large bowl with some olive oil and place your pizza dough in the greased bowl turning the dough to grease all over.  
  • Cover with cling wrap and let it rise till it doubles in size, for about 1 1/2 to 2 hours. 
  • While the dough is rising prepare the pizza sauce and toppings.

PIZZA SAUCE

  • Combine all the ingredients for the pizza sauce in a medium sized bowl and stir until well combined then set aside.
  • You will only need half of the prepared pizza sauce divided among the two pizzas. Freeze and store the remaining half for the next use.

PIZZA TOPPING

  • Heat the olive oil in a fry pan and brown the sausage while breaking up the sausage with a wooden spoon for about 10 minutes. 
  • Transfer the sausage to a large plate and set aside.
  • Using the same frying pan, add in the cut sweet bell peppers and onions.
  • Pan roast the veggies on medium high heat for about 7 minutes with a dash of salt and pepper, adding a little olive oil only if needed.
  • Set aside to cool.
  • When the dough has risen and doubled in size, transfer it onto a well floured counter and cut it in half.  
  • Working with one half at a time, roll the dough out on a floured work surface using a floured rolling pin and roll to fit your pan. 
  • Transfer the rolled pizza dough to your baking pan and repeat with the second half of the pizza dough.
  • Note that I use two 16" round perforated pans and I roll it out with a well floured rolling pin and on a floured counter.
  • If the dough seems to resist rolling just let it rest for a minute then continue rolling it out.
  • A perforated pizza pan does not need to be oiled. If you do not have a round perforated pizza pan you can use a cookie sheet which has been lightly greased.
  • Spread the reserved pizza sauce over the the pizza dough using the back of a spoon. 
  • Sprinkle the 2 pizzas evenly with the grated mozzarella.
  • Top with the sautéed sausages and pan roasted veggies.
  • Bake in a preheated oven @ 425 degrees F, for about 25 minutes or until the crust is golden brown and the cheese has melted.


Filed Under: Bread Focaccia Pizza Tagged With: authentic italian, Italian Food, onions, pizza, red peppers, sausage, tomatoes

Next Page »

Primary Sidebar

A Little About Me

blankHi I'm Marisa! Welcome to my little corner of the web where you'll find delicious foods inspired by my Italian heritage and Canadian upbringing. So kick off your shoes, have a seat and stay awhile... Read More…

Search In My Kitchen

Copyright © 2021 · Foodie Pro & The Genesis Framework