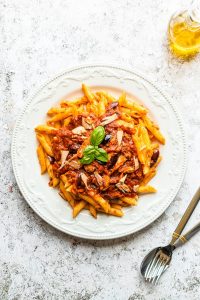
Penne Pasta With Tomato Tuna Sauce is a simple yet delicious Italian tuna and pasta dish. It's one I grew up with as a child and is still, very much a favourite to this day! It's made with just a few …
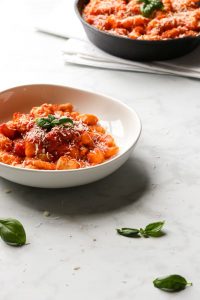
Potato Gnocchi With Tomato Basil Sauce
In this dish, Potato Gnocchi with Tomato Basil Sauce, the humble potato is transformed into a melt-in-your mouth delicacy. Just about any sauce will compliment potato gnocchi. What are …
Continue Reading about Potato Gnocchi With Tomato Basil Sauce →

Pizza with sausage and sweet peppers
A thick crust Pizza with Sausage and Sweet Peppers is my all time favourite kind of pizza. It's topped with an easy to make homemade tomato sauce! Mildly spicy Italian sausages are scattered over the …
Continue Reading about Pizza with sausage and sweet peppers →
Orecchiette with Rapini and Sausage
Orecchiette with Rapini and Sausage. A quick, easy and popular pasta dish topped with crunchy flavored bread crumbs for a lovely contrast and simply perfect for any day of the week. At times we …
Continue Reading about Orecchiette with Rapini and Sausage →
Easy Marinara Sauce
A simple and Easy Marinara Sauce made with good quality San Marzano canned tomatoes. Marinara Sauce From Scratch Canned tomatoes make a delicious Easy Marinara Sauce. The key to making this …
Lasagna
My mother was a kind and gentle soul. On Sunday afternoons she would happily look forward to the arrival of her daughters and grand-kids, greeting everyone at the door and after the initial "buon …