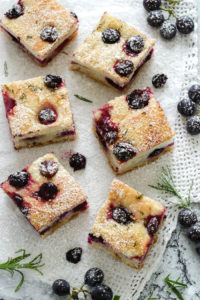
Schiacciata con l'uva is a sweet flatbread with grapes. More commonly known as focaccia, this flatbread is a seasonal dish made yearly during the grape harvest in Tuscany. This recipe was …
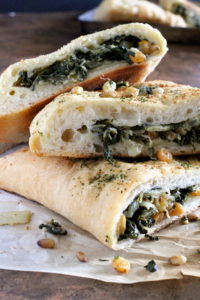
Swiss Chard Mozzarella Calzone
Swiss Chard Mozzarella Calzone are warm pockets of pizza dough stuffed with braised Swiss chard, fresh mozzarella, sweet golden raisins and toasted pine nuts for a delicious lunch or anytime …