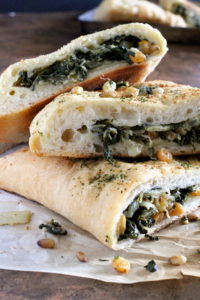
Swiss Chard Mozzarella Calzone are warm pockets of pizza dough stuffed with braised Swiss chard, fresh mozzarella, sweet golden raisins and toasted pine nuts for a delicious lunch or anytime …
Marisa's Italian Kitchen
The Secret Ingredient Is Always Love